HisabOne is an all-in-one business management software designed to simplify and automate day-to-day operations for retail, wholesale, pharmacy, electronics, and manufacturing businesses. It combines a powerful POS system with advanced inventory management, HRM, and full accounting features—making it a complete solution for modern businesses.
With a clean user interface, robust reporting tools, and reliable performance, HisabOne helps businesses track stock accurately, manage sales, control expenses, handle employees, monitor finances, and make smarter decisions—all from one unified platform.
Whether you run a small shop or a multi-branch business, HisabOne delivers the flexibility, scalability, and efficiency needed to manage everything seamlessly.
Support
We are happy to provide support for any issues within our software. We also provide customization. So if you have any features in mind or suggestions, please feel free to contact us at Support. Please note that we don't provide support though any other means (example- WhatsApp, comments etc.). So, please refrain from commenting your queries on codecanyon or knocking us elsewhere.
Also, in case of any errors/bugs/issues on your installation, please contact us with your hosting details (url, username, password), software admin access (url, username, password) and purchase code. If your support period has expired, please renew support on codecanyon before contacting us for support.
Thank you and best wishes from LionCoders.
Server Requirements
All our products are designed on most popular PHP framework Laravel. You need to have minimum requirement for running all our application. Please make sure that you have completed these requirements.
- •Preferred Server – Apache/Nginx
- •PHP Version 8.3
- •OpenSSL PHP Extension
- •PDO PHP Extension
- •PHP Fileinfo Extension
- •Mbstring PHP Extension
- •Tokenizer PHP Extension
- •Zip Archive PHP Extension
- •Mod Rewrite Enabled
Please note if you try to install the application on any other server say LiteSpeed or IIS, you may get undesirable result. We do not recommend you to use other server than Apache or Nginx. Also we do not provide support for installation in server other than Apache.
Addons
HisabOne WooCommerce
Imagine you have an existing WooCommerce website. Now you want to use HisabOne and also want to synchronize your WooCommerce website with HisabOne. If you want to do so then this is the ultimate solution you are looking for. HisabOne WooCommerce addon comes with complete synchronization with your WooCommerce website. You can synchronize your orders from WooCommerce to HisabOne. Also you can can synchronize products, categories from HisabOne to WooCommerce. And you have to map your Salepro taxes with WooCommerce taxes.
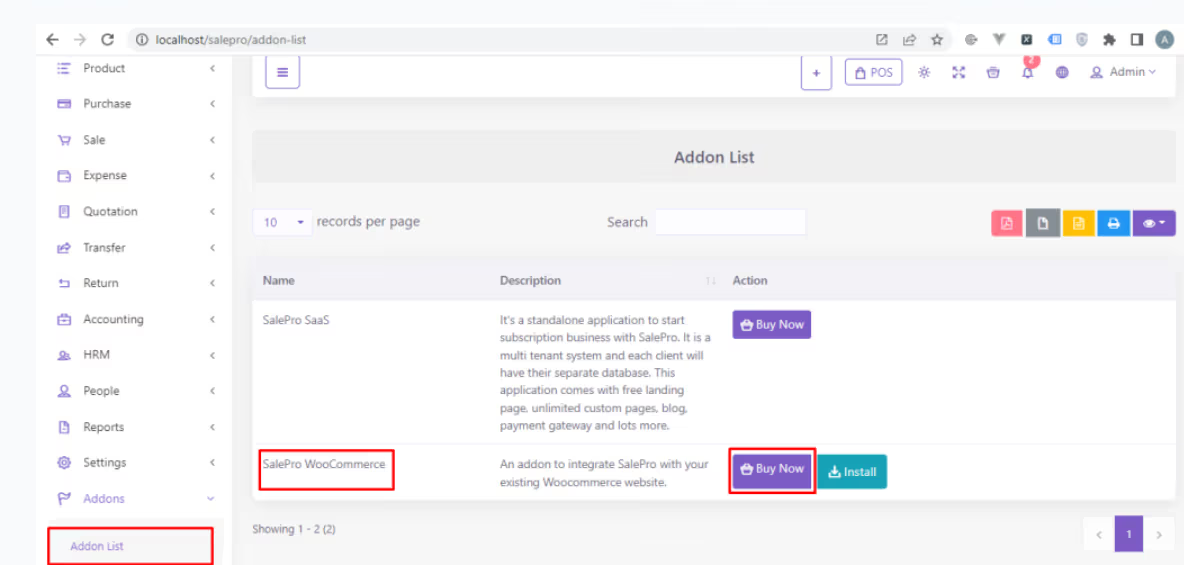
To purchase this addon go to the addon list from left sidebar and click on the Buy Now button.
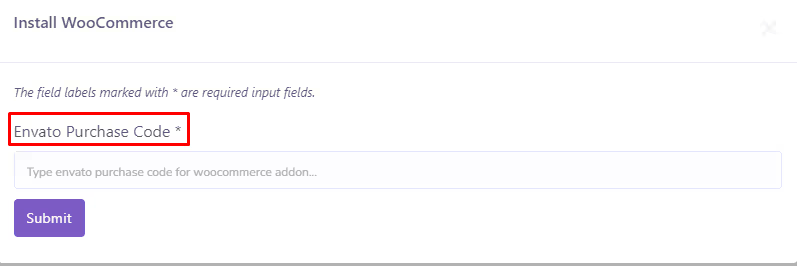
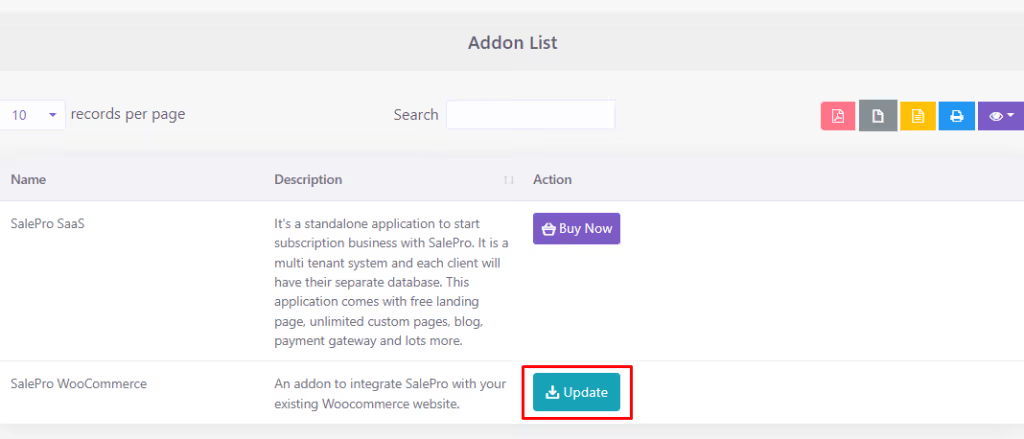
After purchasing this addon from codecanyon click on the install button. Type your purchase key which you will get from the envato during the purchase. Then click on the submit button. If your purchase key is correct then the addon will be installed automatically and you will see a new option on the left side bar named WooCommerce.

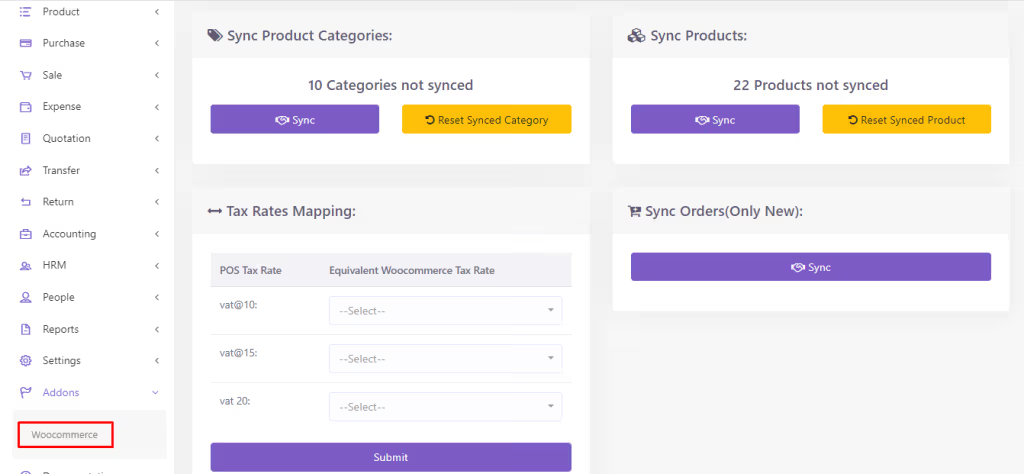
If you go to the WooCommerce section you will get all the necessary options to sync your Wocommerce categories, products, taxes and orders. You can also sync products from HisabOne to WooCommerce from the product create or edit page.
When we released the update you can update it automatically from the addon list page.
SAAS Addon
Please Carefully check the Difference between the HisabOne SAAS Addon and the Standalone HisabOne SAAS Version.
Installation Instructions:
- 1. After purchasing the SaaS add-on from CodeCanyon, click the Install button.
- 2. Enter the purchase key you received from Envato during purchase.
- 3. Click Submit to complete the installation.
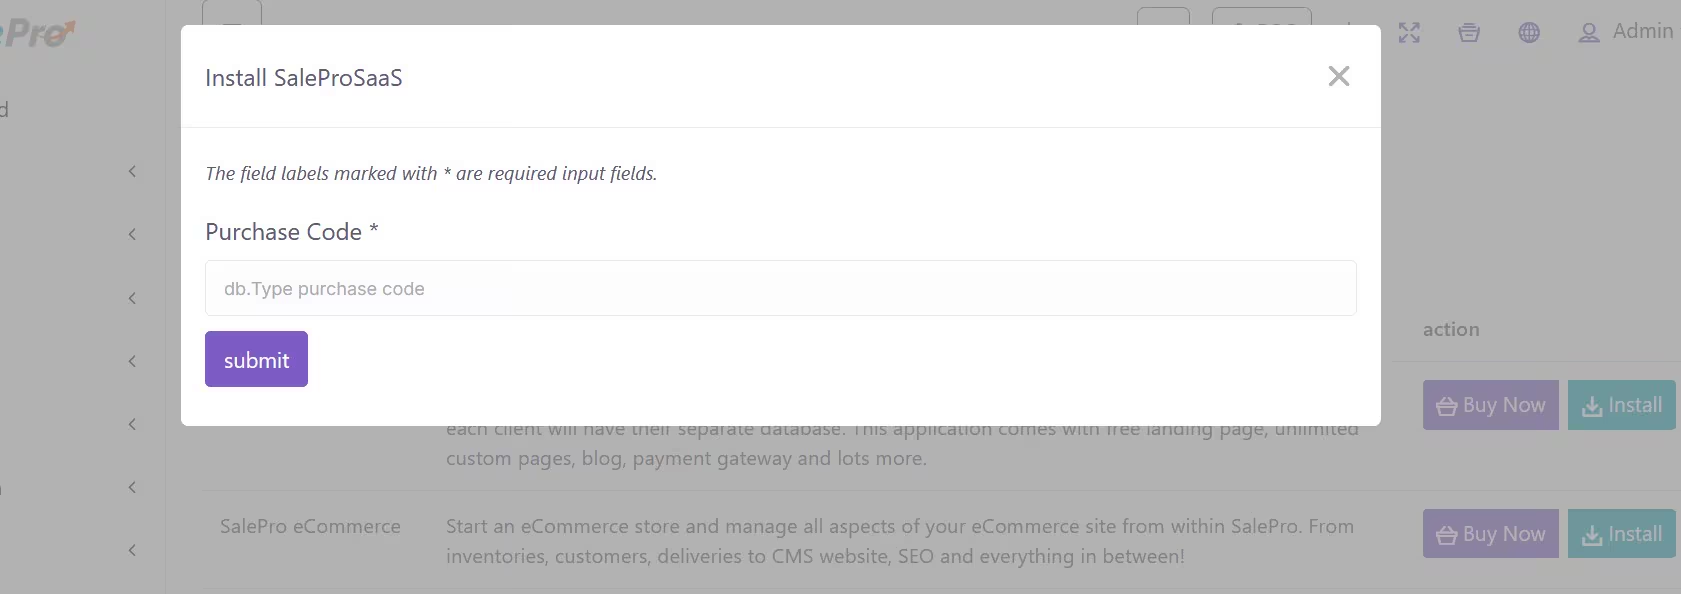
If your purchase key is correct then you will redirect to saas installation page.
For HisabOne SAAS installation and documentation , please visit HisabOne SAAS Docs
Common Errors
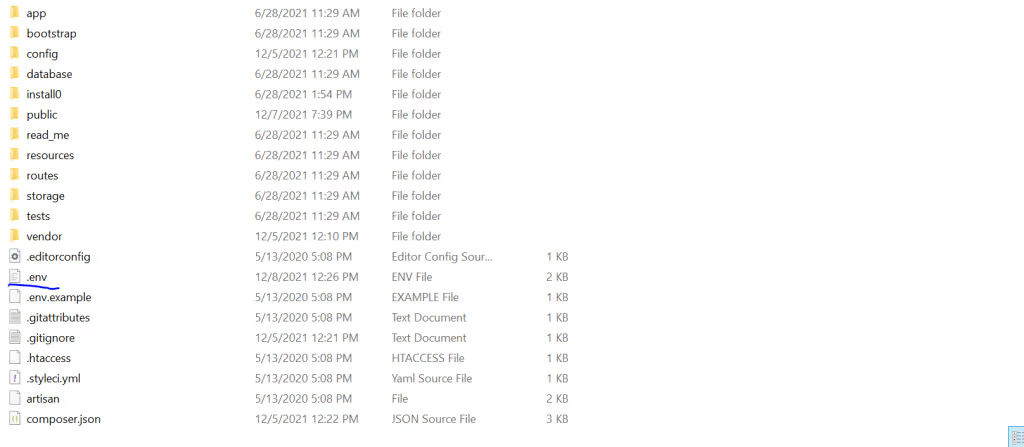
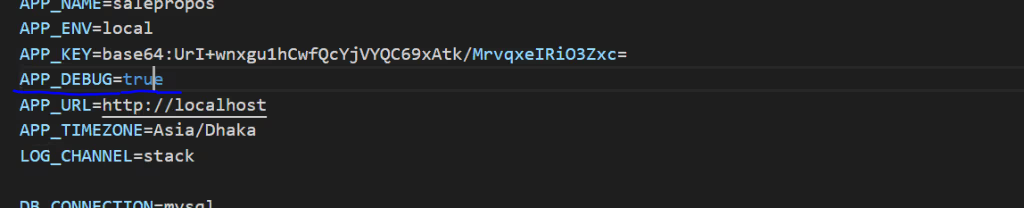
If you face 500 server error after installing the software please update your php version to 8.2+. If you still get 500 error after updating php version, please open your '.env' file and change the value of 'APP_DEBUG' to true. You'll find '.env' file in the root folder (HisabOnePOS) And then go to the page again where you were getting 500 server error. You should see description of actual error now. Please take a screenshot and send it over along with your cpanel access details, so that we can look into it.
Installation
Localhost
If you are installing on localhost, please keep in mind that you'll need Internet for installation. After installation, you can use HisabOnePOS without Internet. We suggest you use XAMPP for localhost. You can use other solutions like WAMP, MAMP etc. as well and installation process for all of them are same.
Create a folder inside htdocs folder inside your XAMPP installation. Now copy the zip folder you downloaded from Codecanyon to htdocs folder and unzip it there. Rename it to whatever you want. Say, you have named it- 'my-folder'. Now start your XAMPP (or whatever you are using) and go to your browser and access HisabOnePOS from your browser like- localhost/my-folder/.
While installing you may face 'max execution time error', as importing database takes a while. To solve this issue, please increase 'max_execution_time' and 'memory_limit' value in your php.ini file. set memory_limit=512M and max_execution_time=480. for reference- How to edit php.ini file on localhost (XAMPP)
Online Hosting
Upload the zip folder you downloaded from Codecanyon to your hosting and unzip it. Please make sure you configure your web hosting's settings, so that it shows hidden files and folders (for reference- How to enable hidden files and folders on cpanel) This is to ensure that if you copy/move the contents from the unzipped folder to any other location, you copy all the files including '.htaccess', '.env' files which are necessary for the proper functioning of the software. Now you can access the folder where you have HisabOnePOS from your browser.
Now follow the installation process below.
Steps
Step 1
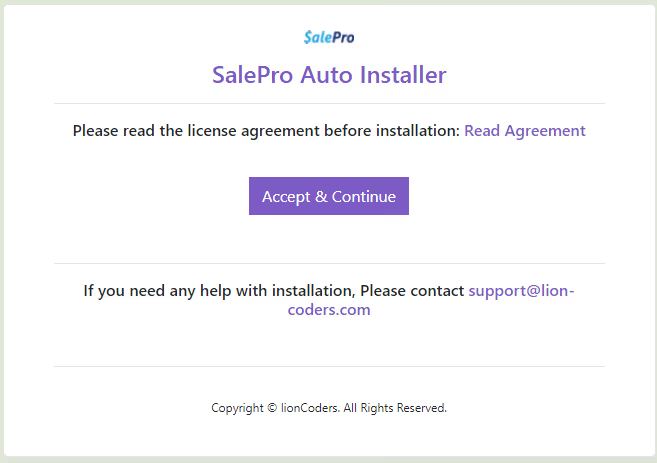
- Please read the license agreement before proceeding.
- You need to accept and continue for going to the next step.
Step 2
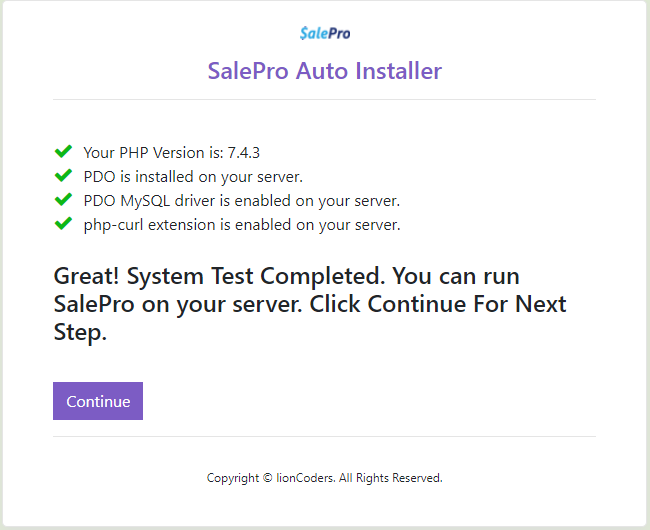
The system will automatically check for the server requirements. If all the requirements are fulfilled, You can proceed for further action.
Step 3
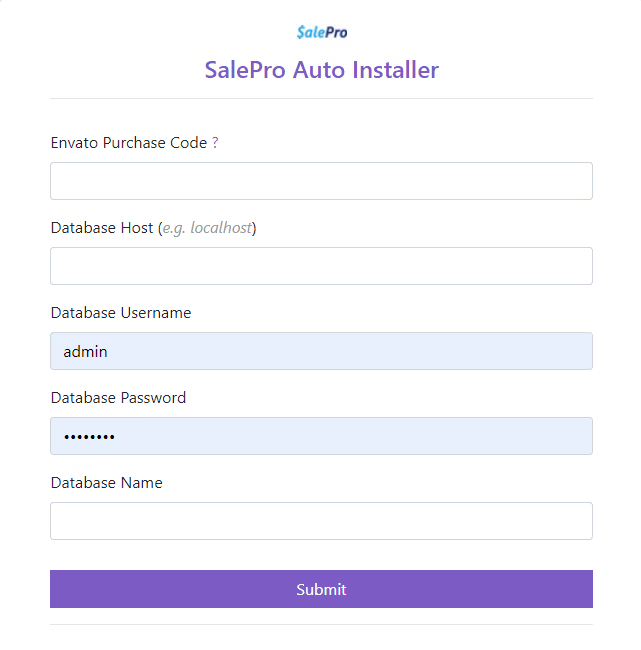
- You have to fill up the form with correct information.
- Please input the purchase code.
- Input your database host e.g(localhost).
- Your database username e.g(root).
- Your database password (if any).
- The database name that you have already created.
- Click on submit.
Step 4
Congratulations! You have successfully installed HisabOnePOS.
Installation Video
Watch here is a video demonstrating the steps stated above.
Changing Domain & Hosting
Backup
Before beginning the process, it is strongly recommended to take a backup.
Move to new Domain
To transfer your application from one domain to another (e.g., from `oldsite.com` to `newsite.com`), follow these steps:
- 1. Point the new domain (`newsite.com`) to your existing codebase.
- 2. Open the `.env` file and update the `APP_URL` to the new domain (`newsite.com`).
That's it! You can now access your application at `newsite.com`.
Changing the Hosting
If you're switching from one hosting service (e.g., `hosting-1`) to another (e.g., `hosting-2`), follow these steps to move your HisabOne application:
1. Transfer the Codebase
- Compress the current HisabOne codebase into a ZIP file on `hosting-1`.
- Upload the ZIP file to `hosting-2` and extract its contents.
2. Migrate the Database
- Export the existing database from `hosting-1`.
- Create a new database on `hosting-2` and import the exported data.
3. Update Domain Settings
Change your domain's NameServer records to point to the new hosting (`hosting-2`).
4. Configure Environment Settings
Open the `.env` file on `hosting-2`.
Update the database connection details:
DB_HOST=
DB_DATABASE=
DB_USERNAME=
DB_PASSWORD=
Done!
If you're also moving to a new domain, refer to the earlier section for updating the `APP_URL` in the `.env` file.
Help with installation
We can help you install on any cpanel based hosting for as little as $30. You can send the money via paypal to [email protected]. Contact us at Support with your hosting details and payment proof and we'll take care of the rest.
Please note– We don't provide any suppot to install on localhost.
Software Update
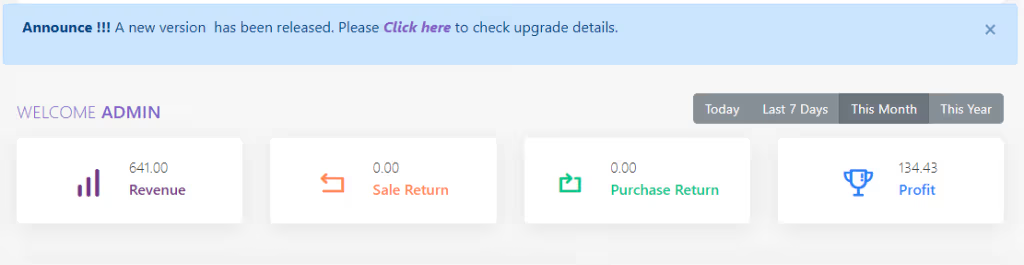
Any admin/owner user will be notified on the dashboard when the update will be released. It is highly recommended that you take a backup of your files and database before updating.
In case you don't get auto update notification, please download the latest files from CodeCanyon and unzip it where your HisabOne files are. It will override the existing files. after you do that, go to the browser and type 'migrate' after your url and hit enter (like- https://your_url.com/migrate). it will migrate if anything needs to be migrated.
Note: If you have any customizations, please do not click the Update, it will override your changes.
POS Printer Configuration
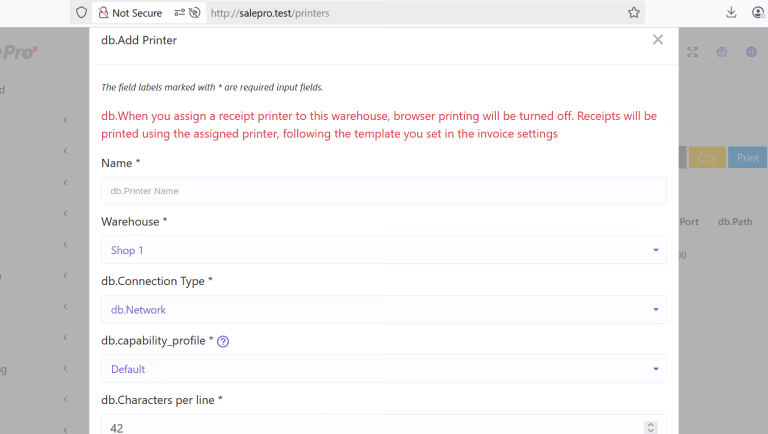
*** When you assign a receipt printer to the warehouse, browser printing will be turned off for that warehouse. Receipts will be printed using the assigned printer, following the template you set in the invoice settings. ***
Thermal ESC/POS printers
- 1. Go to Settings → Receipt Printers and click Add New Printer.
- 2. Choose the Connection Type based on your setup:
- Network Printer: Enter the printer's IP Address.
- Windows Printer: Share the printer with your computer and provide the file path in the format:
`smb://computer_name/my_printer_name` (Replace `my_printer_name` with the actual shared printer name.)
- Linux Printer: Enter the device file path. Common examples include:
- • Parallel: `/dev/lp0`
- • USB: `/dev/usb/lp1`
- • USB-Serial: `/dev/ttyUSB0`
- • Serial: `/dev/ttyS0`
- 3. Select the Warehouse, choose the correct Capability Profile, and specify the Characters Per Line supported by your printer.
- 4. Click Save to complete the configuration.
- 5. Navigate to Settings → Invoice Settings and set the template with your preferred paper size (58mm or 80mm) as the default.
Browser-based printing
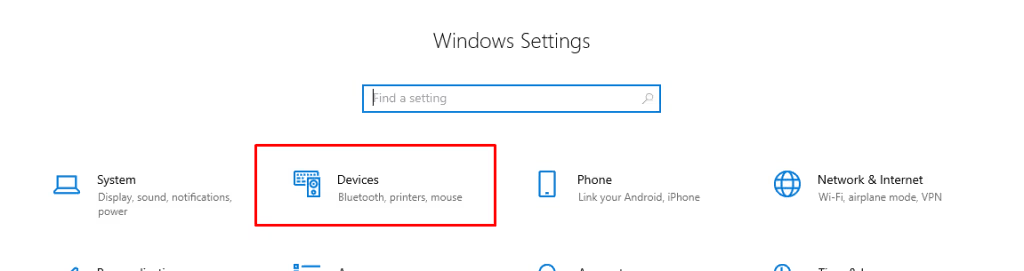
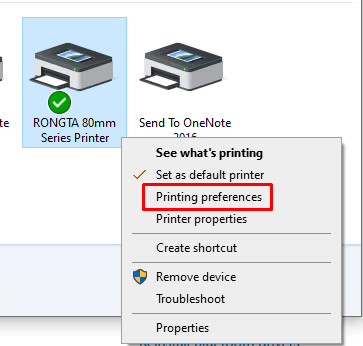
First you have to install your printer driver. Then go to settings and select Devices.
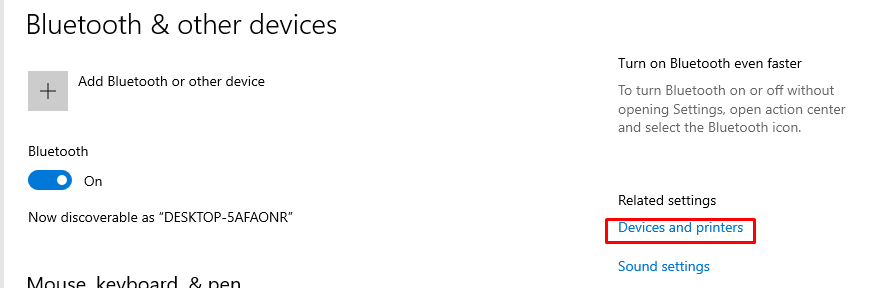
Then go to Devices and printers.
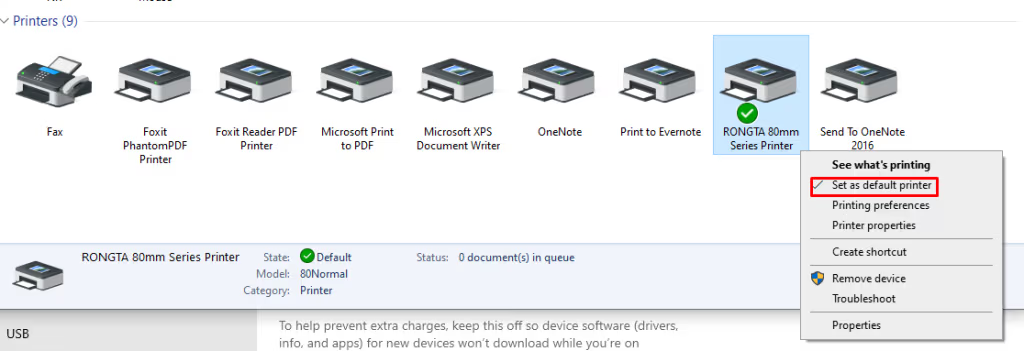
Set your POS printer as default printer
Then go to Printing preferences.
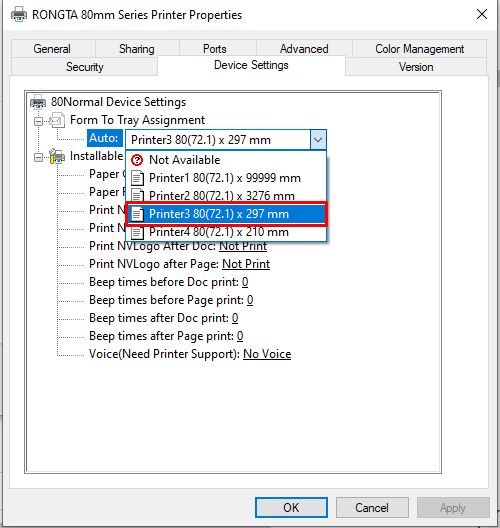
Then go to Advanced.
Select 3rd option of paper size and click Ok.
After that go to printer properties.
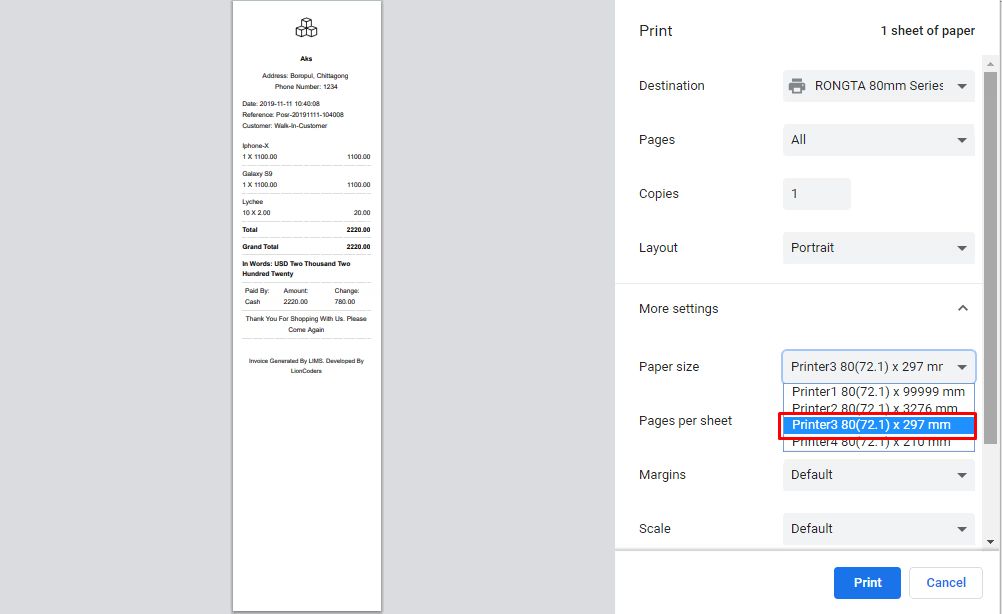
POS Printers
Many thermal receipt printers support ESC/POS to some degree. This driver has been known to work with:
Customer Display Screen
The Customer Display Screen enables customers to view their order details in real time during the billing process. This feature enhances transparency, improves trust, and engages customers by clearly displaying item names, individual prices, and the total payable amount.
How to View the Customer Display Screen
To access the Customer Display Screen, follow these steps:
- Step 1: Navigate to the POS screen, where you will see a screen icon.
- Step 2: Click on the icon to open the Customer Display Screen in a new browser tab.
Once opened, any changes you make in the POS screen—such as adding, deleting, or updating product prices—will be instantly reflected on the Customer Display Screen in real time.
Empty Database
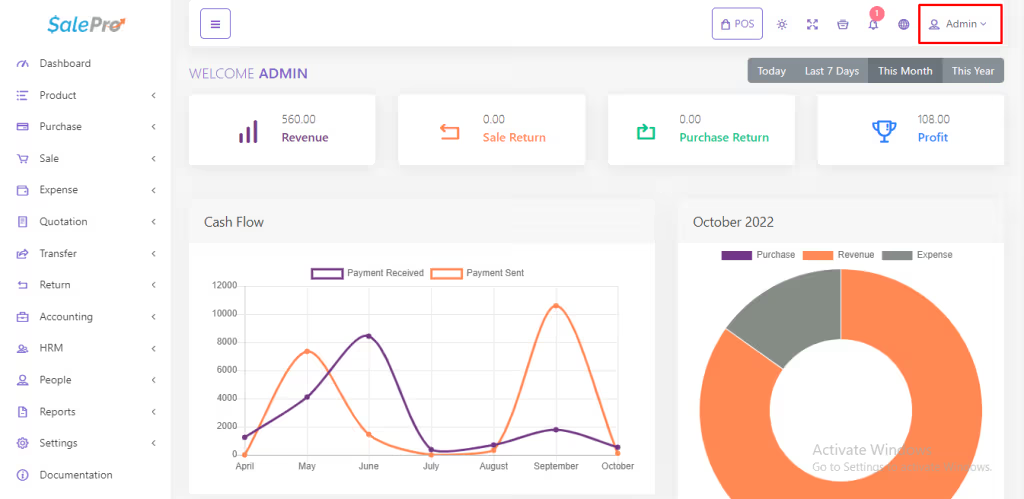
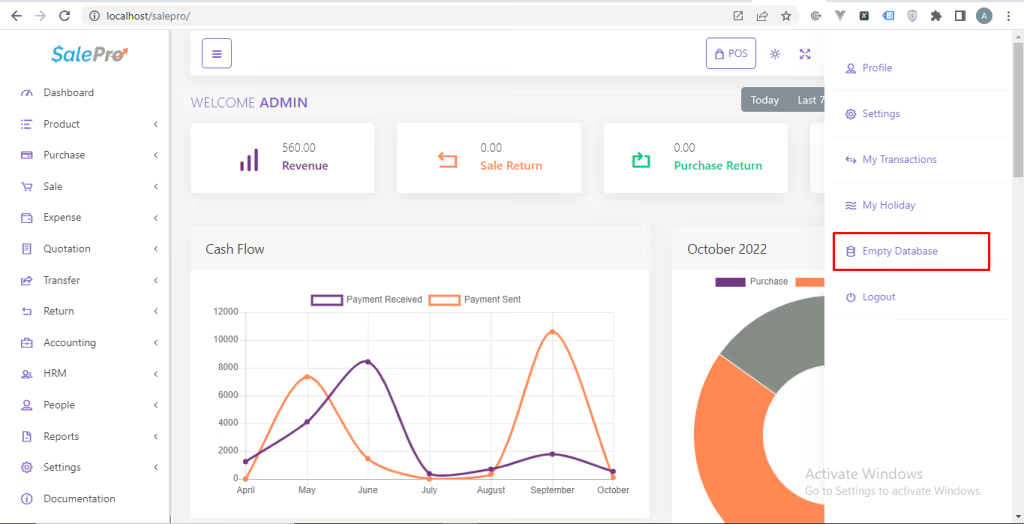
When you install this software it will come with some dummy data. To delete all these dummy data click on your username on the top navigation bar. Then you will see an option named Empty Database. Click on that and all the dummy data will be deleted automatically.
Mail Server Settings
To add mail functionality to your inventory you have to setup mail server first. To do this go to Mail Setting under Setting module. You have to fill up the following information.
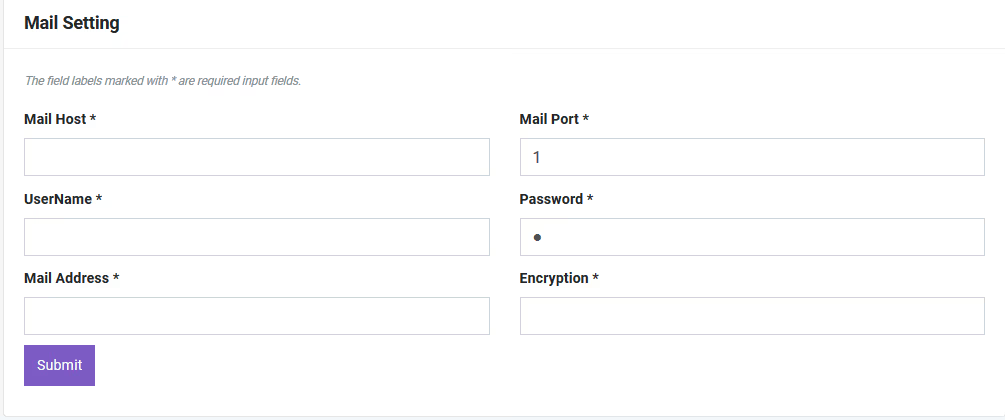
Here's detailed documentation for the possible inputs of the Mail Settings form:
The Mail Settings form allows configuring the email settings required for the system to send emails. Below is a detailed explanation of each field, including examples of valid inputs:
Mail Driver
Specifies the email sending protocol. Common options include SMTP, Mailgun, or Sendmail. Possible Inputs:
- SMTP (Simple Mail Transfer Protocol): The most commonly used driver for sending emails.
- Sendmail: Uses the server's Sendmail binary for email sending.
- Mailgun: A third-party email service.
- Log: Logs emails to storage for debugging purposes.
Example Input: `SMTP`
Mail Host
The server address of the mail service provider. Possible Inputs:
- Gmail: `smtp.gmail.com`
- Outlook: `smtp.office365.com`
- Yahoo Mail: `smtp.mail.yahoo.com`
- Custom Host: Specify the host address if using a custom email provider.
Example Input: `smtp.gmail.com`
Mail Port
The port number for the mail server. This depends on the encryption method and the email provider. Possible Inputs:
- For SMTP with TLS encryption: `587`
- For SMTP with SSL encryption: `465`
- For Non-encrypted SMTP: `25` (not recommended).
Example Input: `587`
Mail Address
The email address used to send emails from the system.
Format: A valid email address.
Example Input: `[email protected]`
Mail From Name
The name displayed as the sender in email recipients' inboxes.
Format: A string value representing the sender's name.
Example Input: `Your Company Name`
UserName
The username for authentication with the mail server, usually the email address.
Format: A valid email address or username string provided by the email service provider.
Example Input: `[email protected]`
Password
The password or API key used to authenticate the email account.
Format: Alphanumeric string (ensure this is kept secure).
Example Input: `yourpassword123`
Note: For providers like Gmail, you may need to generate an app-specific password if two-factor authentication is enabled.
Encryption
Specifies the encryption protocol to secure communication with the mail server. Possible Inputs:
- `TLS`: (Transport Layer Security) A common protocol for securing SMTP connections.
- `SSL`: (Secure Sockets Layer) An older protocol for secure connections.
- `None`: No encryption (not recommended).
Example Input: `TLS`
Validation Requirements
- • Mandatory Fields: All fields marked with an asterisk (*) are required.
- • Input Formats:
- - Email addresses must be valid (e.g., `[email protected]`).
- - Ports must be numeric (e.g., `587`).
- - Passwords should not contain spaces.
Example Configuration for Gmail
- • Mail Driver: `SMTP`
- • Mail Host: `smtp.gmail.com`
- • Mail Port: `587`
- • Mail Address: `[email protected]`
- • Mail From Name: `Your Business Name`
- • UserName: `[email protected]`
- • Password: `yourpassword`
- • Encryption: `TLS`
Common Errors and Troubleshooting
- • Authentication Errors: Ensure the correct username and password are provided. For Gmail, enable "Allow less secure apps" or use an app-specific password.
- • Connection Errors: Verify the host and port match your email provider's configuration.
- • Email Delivery Issues: Check spam filters and ensure the "From" address has been verified with your mail provider.
Dashboard
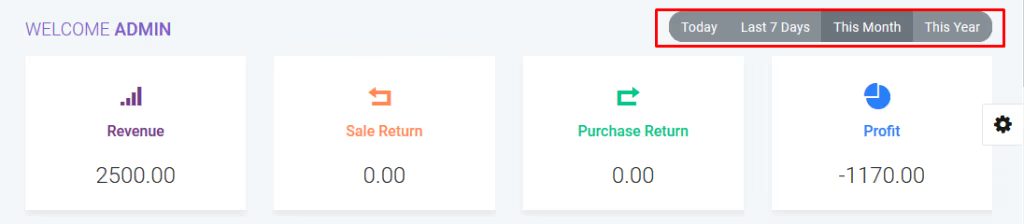
We have a gorgeous looking dashboard for our customer from where they get Revenue, Sale Return, Purchase Return and Profit information of today / last 7 days / current month / current year at a glance by one click.
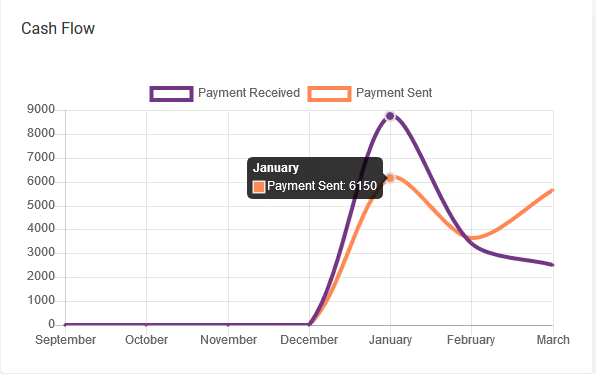
You will get information of your cash flow that means how much money you are earning and how much money you are spending from this line chart.
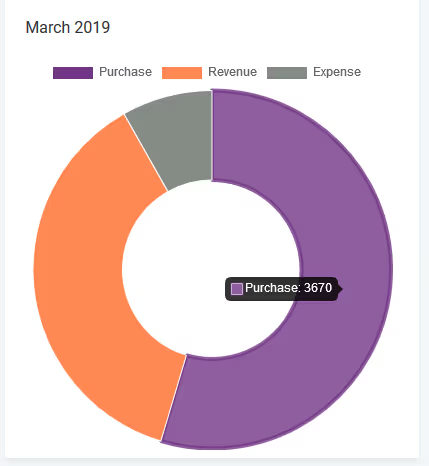
You also aware of your current month's purchase, revenue expenditure froms this doughnut chart.
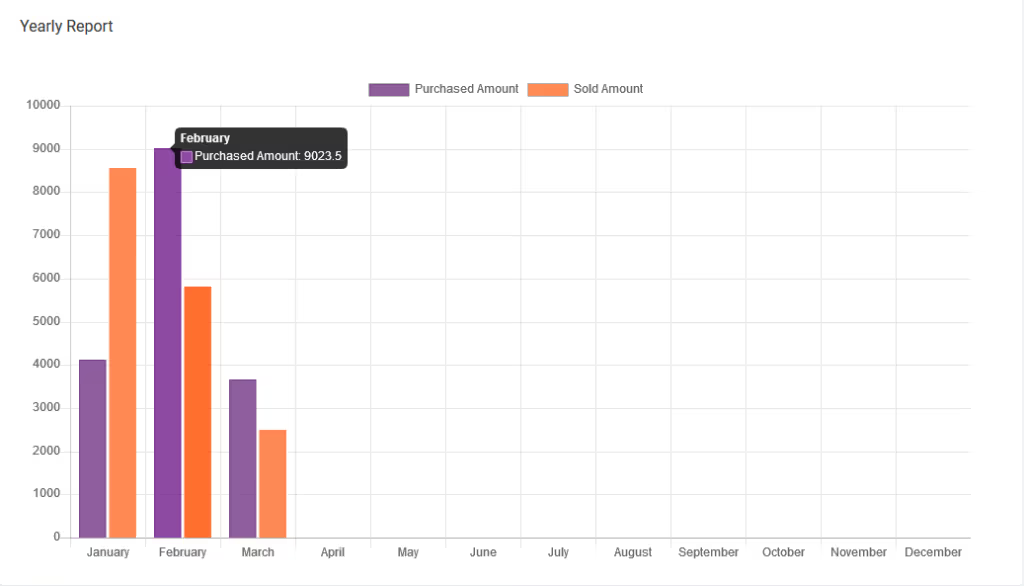
A bar chart shows Yearly report of purchases and sales of current year.
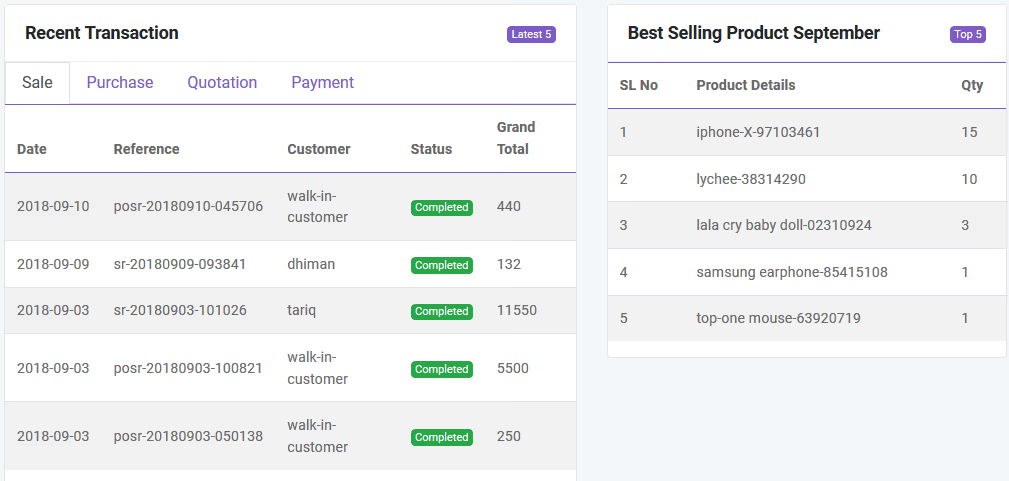
From Dashboard You will also get recent transaction(sale, purchase, quotation, payment) and top 5 best selling product of current month and current year.
Product List
Category
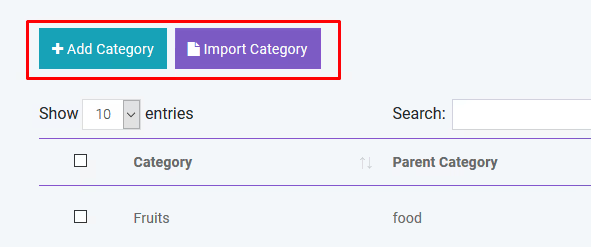
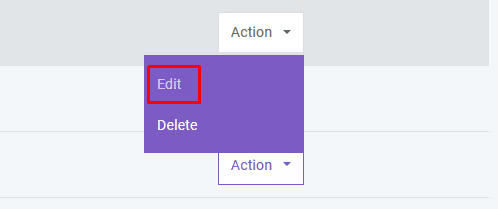
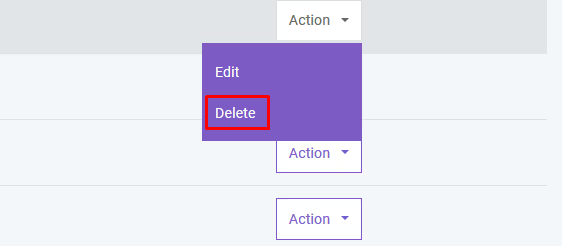
You can add, edit, and delete product categories. You can also import categories from a CSV file and export table data to PDF, Excel, or CSV. You can also print the data from the table.
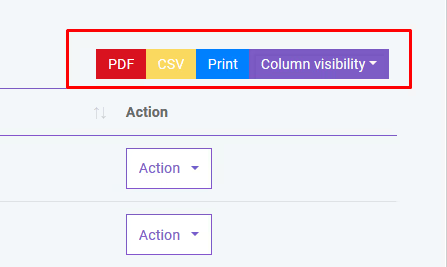
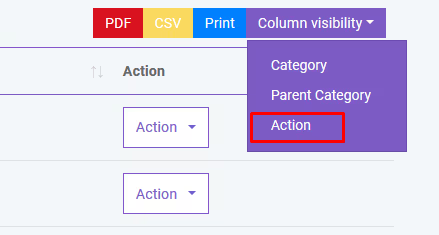
If you do not want to export any column, you can do so by clicking the column visibility button. From here, you can choose the column to remove from the table.
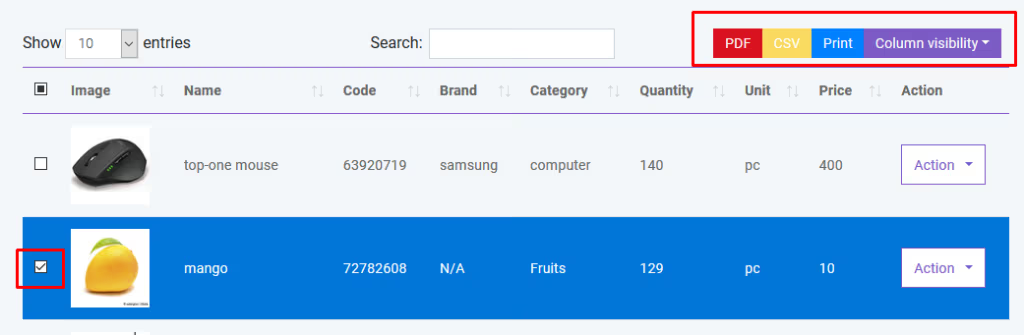
To export data from a specific row, you only need to select the checkbox for the relevant row.
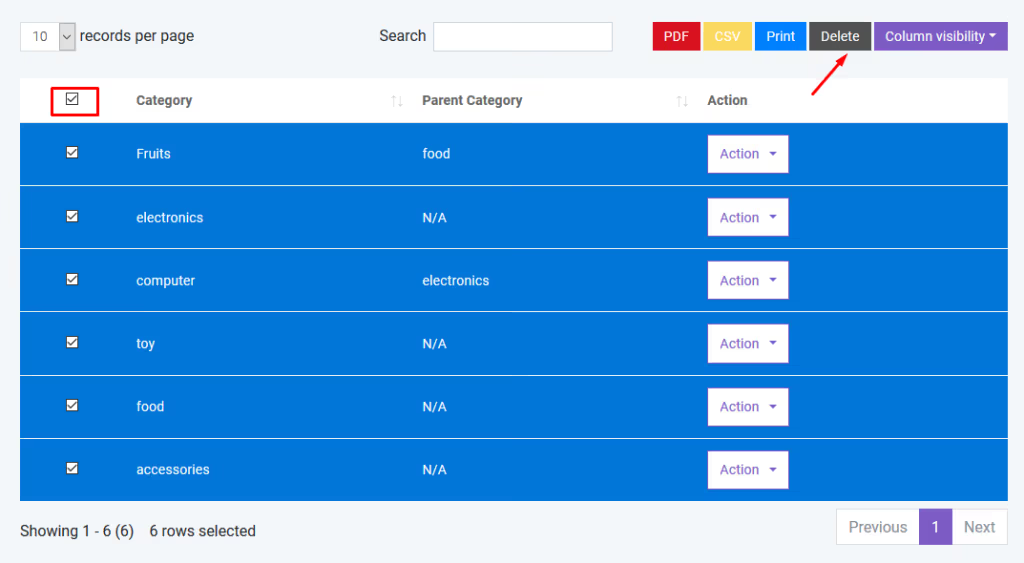
If you want to delete all rows from the table, you can easily do so as shown below. You can also delete a specific row from the table.
If you want to search for anything in the table, you can simply type the keyword in the search box.
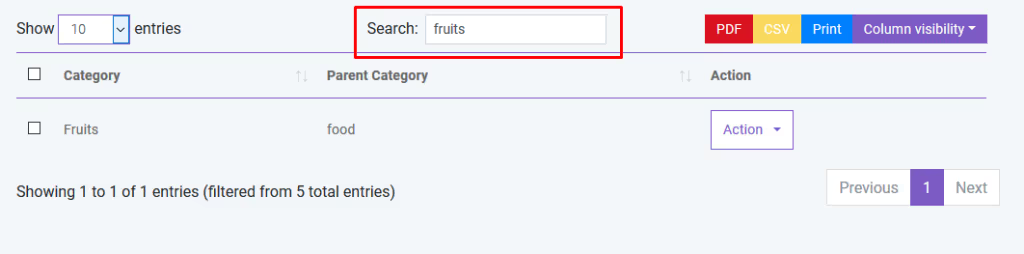
You can also control pagination from the Show dropdown menu.

Product
In the product section, you will only add general information about the product. To add stock, you must purchase this product. You can create three types of products in HisabOne.
- Standard
- Digital
- Combo (a combination of standard products. For example, mango juice is a combo product because it consists of mango and sugar).
- Service
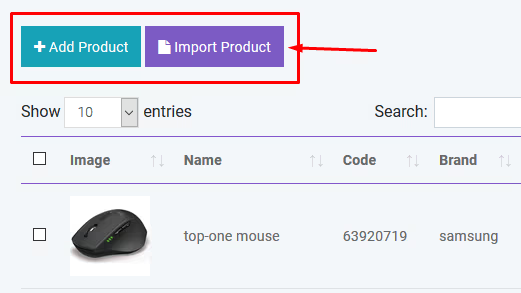
You can add, edit, and delete products. You can import products from CSV. You must follow the instructions to import data from CSV. For a better understanding, you can download the sample file.
You can sort table data by column.

You can also search, export, and print from the table as discussed earlier in more detail.
Adjustment
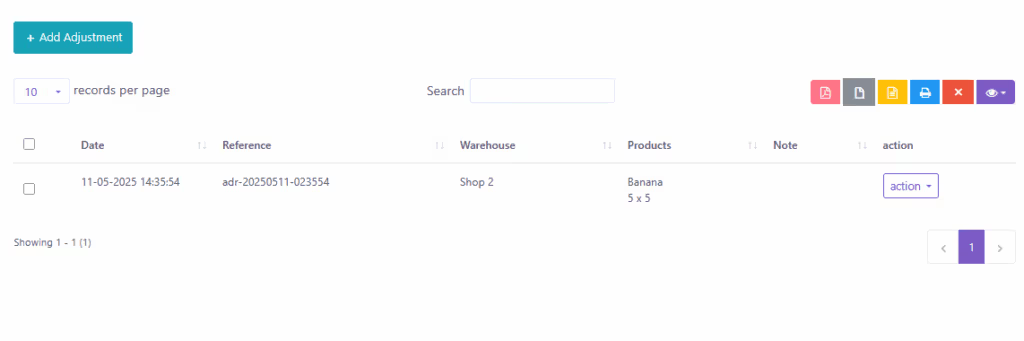
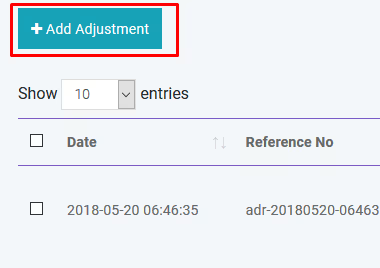
If you want to make adjustments to products such as adding or subtracting quantity, you can do it from here. To create an adjustment, click Add Adjustment, and if you want to edit or delete an adjustment, use the actions.
Stock Count
If you want to know the product quantity for a specific warehouse or all warehouses, you can view it from here.
Weight Scale Machine
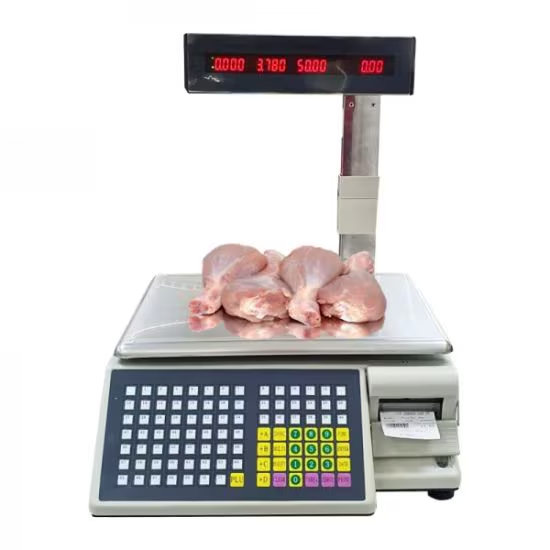
HisabOnePOS is compatible with weight scale machines. However, you must strictly follow the rules. The weight scale machine will provide a barcode label with 13 digits. See the following image:
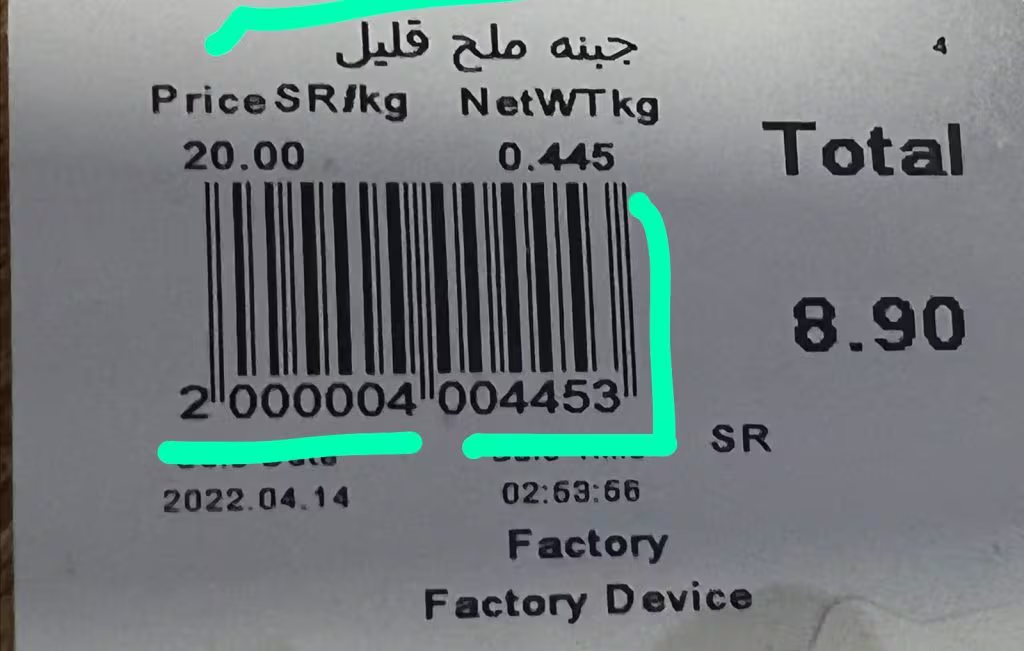
Here, the first 7 digits are the product code, which must match the product code in HisabOnePOS. The next 5 digits contain the weight, and the last digit is a random number. When you place a product on the weight scale machine, it automatically generates this type of label. All you need to do is scan this label. The product information and weight will be calculated automatically in HisabOnePOS. The product code must be the same in both HisabOnePOS and the weight scale machine.
Purchase
Add Purchase
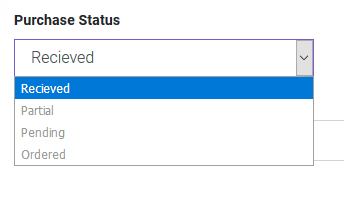
You can create purchase in Purchase module. By creating purchase the stock quantity of product will be increased. .There are three purchase status: Recieved, Partial, Pending, Orderd. You can add product to order table by typing or scanning barcode of product.
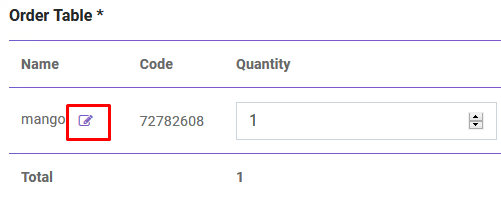
You can also edit product info from order table.
After creating purchase you will be redirected to purchase index page. You will get summary of purchase from table. To get details you just have to click in the table row.

Import Purchase
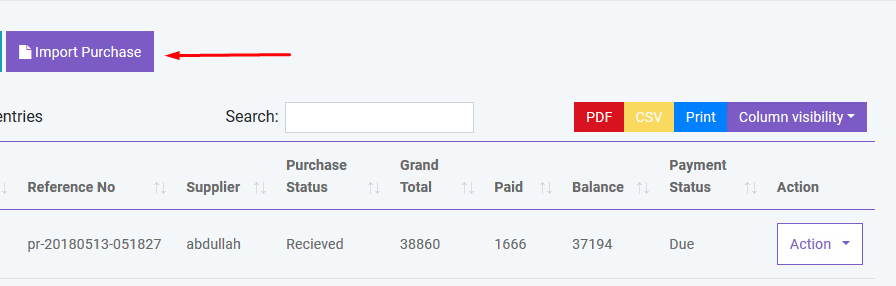
You can import sale from CSV.You must follow the instruction to import data from CSV. To get better understanding you can download the sample file.
Payment
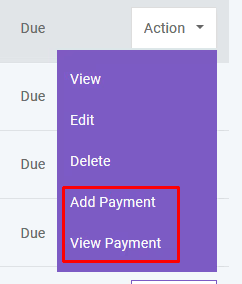
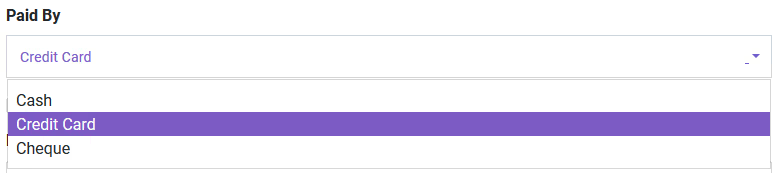
You can make payment from Purchase table. You can make payment with Cash, Gift Card, Cheque, Credit card and Deposit.
And you can search, export and print data from table.
Automated Purchase
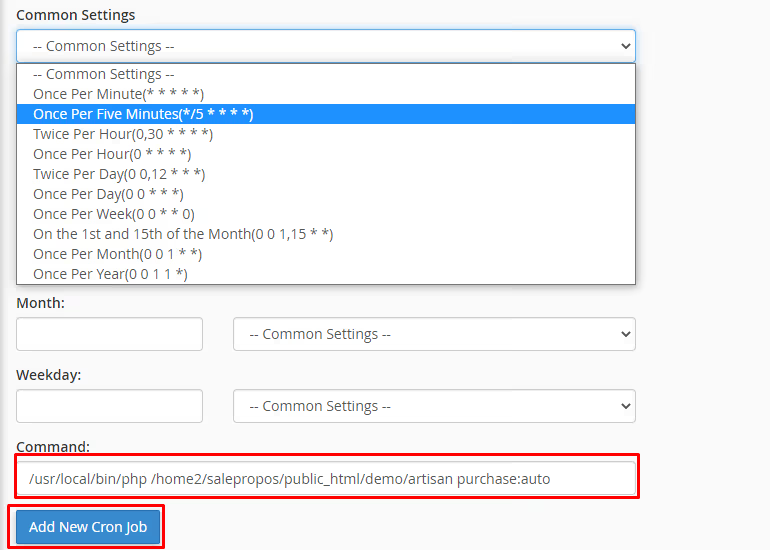
User can make the purchase automated for those products which quantity exceeds the alert quantity by setting up the cron job. Please follow the following steps to make it workable.
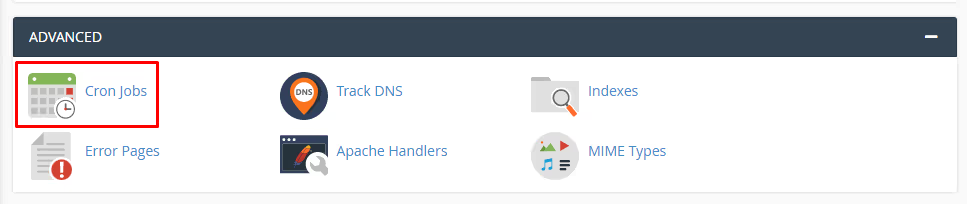
First go to the cpanel and go to the cron job settings
Then set up the cron job as described below. Here cron job is set for every 5 minitues. So the system will check in every five minitues and if any product exceeds the alert quantity an auotomated purchase will be made.
Sale
POS
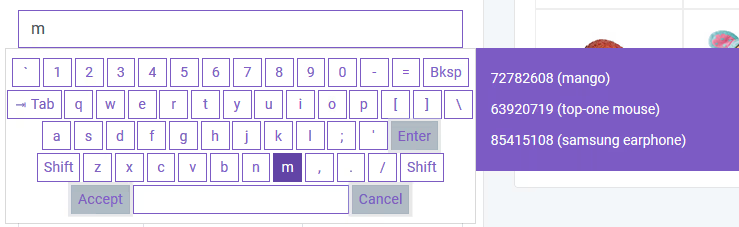
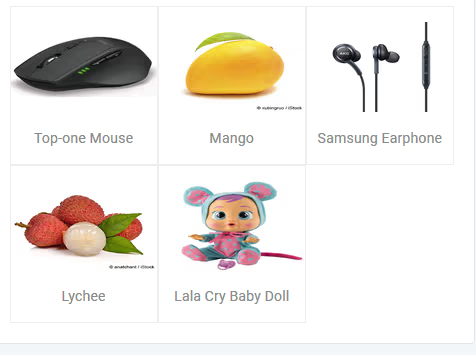
You can create sale from POS. Customer, Warehouse and Biller (representative of your company) will be automatically selected according to POS Settings under Settings menu. Touch screen keybord is activated in POS module. You can add product to order table by typing or scanning barcode of product. Featured Product will be displayed in the right side. You can also add product by clicking product image. You can edit product info from order table.
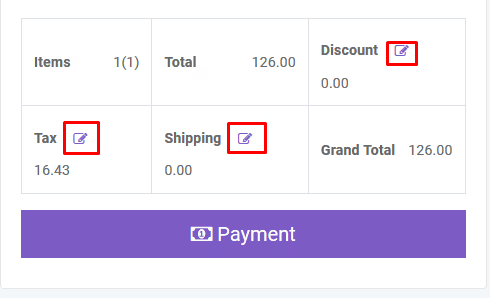
To add order discount, order tax and shipping cost you just have to click the button that are shown below. To finalize the sale you have to click the Payment button.
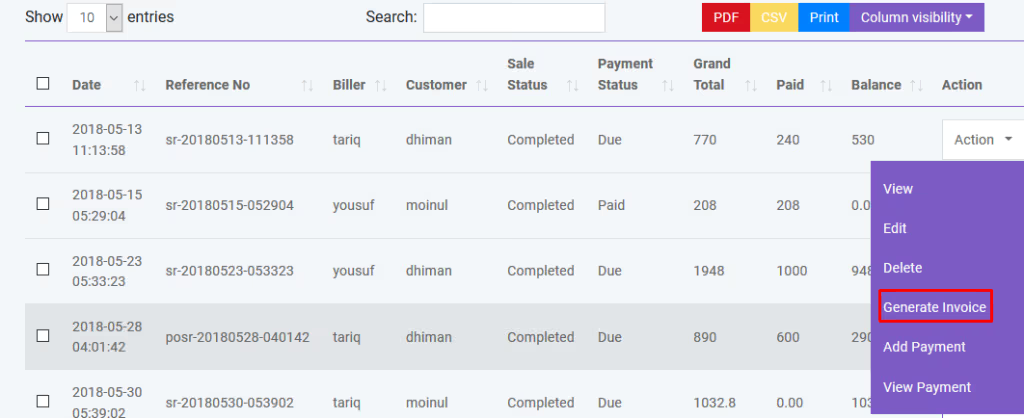
After creating sale you will be redirected to sale index page. A confirmation mail will be sent automatically to customer's email with sale details. You will get summary of sale from table. To get details you just have to click in the table row.
You can also generate Invoice automatically which is beutifully designed.
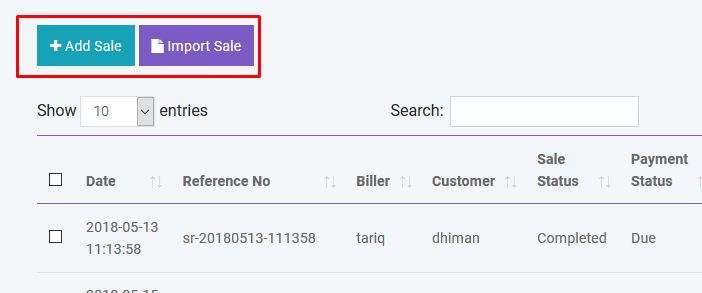
You can also create sale by clicking Add Sale button. Also you can import sale from CSV.You must follow the instruction to import data from CSV. To get better understanding you can download the sample file.
Payment
You can make payment from Sale table. You can make payment with Cash, Cheque, Credit Card, Gift Card, Deposit and Paypal. A confirmation mail will be sent automatically to customer's email with payment details.
And you can search, export and print data from table.
Delivery
You can add delivery for your sold products. A confirmation mail will be sent automatically to customer's email with delivery details.
And you can search, export and print data from table.
Gift Card
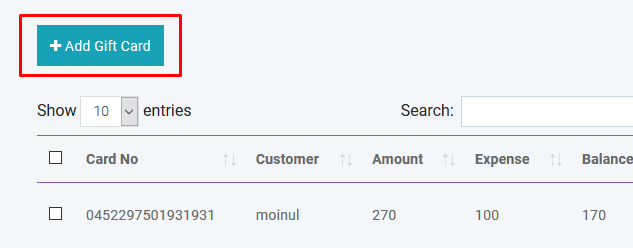
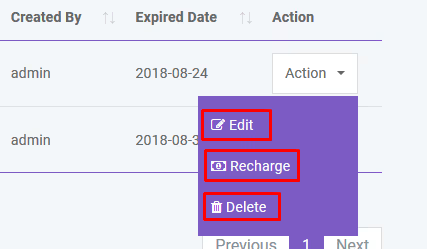
You can sell GiftCard to customer. By using gift card customer can purchase product. Again GiftCard can be recharged. Customer will be notified by mail when assigning or recharging a GiftCard.
Packing Slip
You can create Packing Slip from sale list for Pending Sales. From sale list, go to to 'action' for any pending sales and you'll see 'create packing slip' option
Challan
You can create Challan by selecting one or many Packing Slip from here.
You can finalize Challan from here.
Coupon
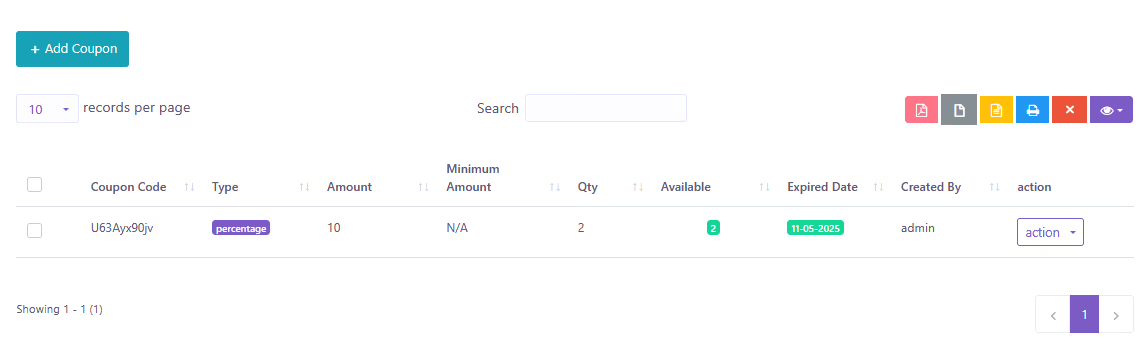
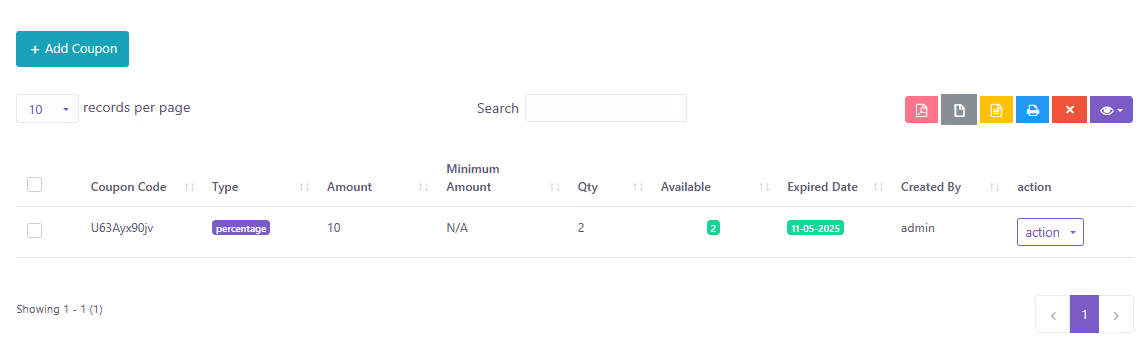
You can Create, Edit, and Delete coupon from this page.
Courier
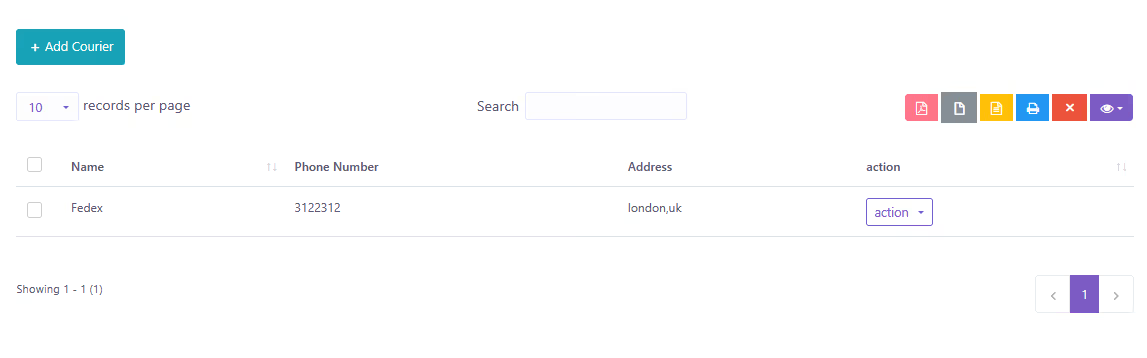
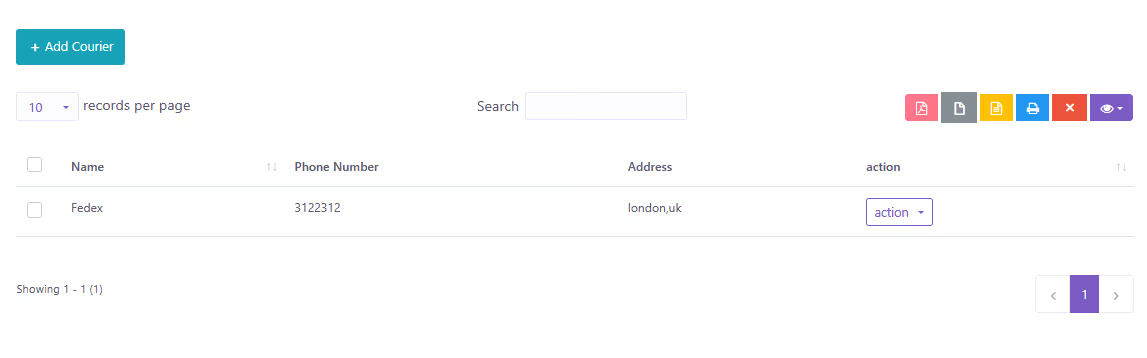
You can Create, Edit, and Delete your desired Courier from this page.
Expense
Expense Category
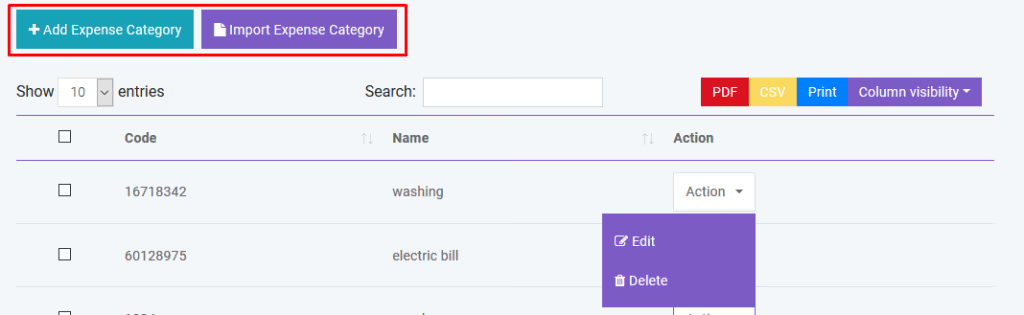
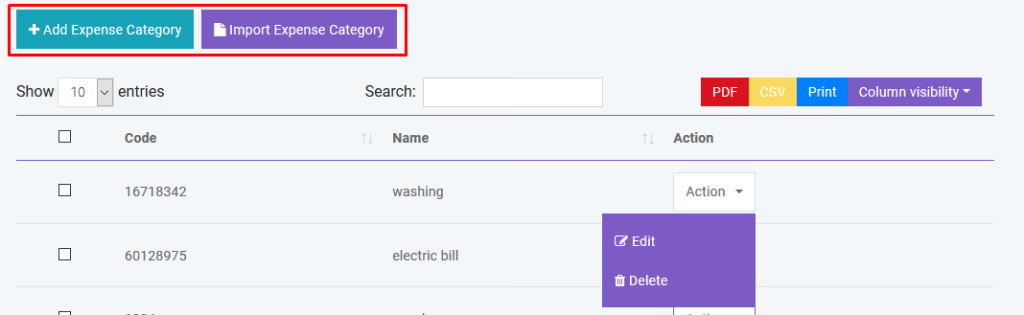
You can create, edit and delete expense category in Expense module.
Income
Income Category
You can create, edit and delete income category in Income module.
Income
You can create, edit and delete income in Income module.
And you can search, export and print data from table.
Quotation
Add Quotation
You can create quotation in Quotation module. There are two quotation status: Pending and Sent
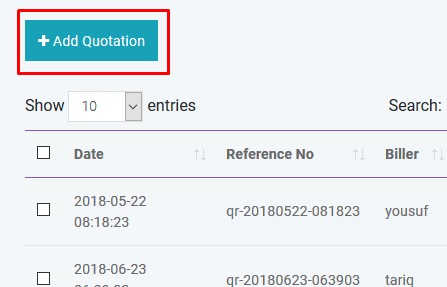
If quotation status is Sent a confirmation mail will be sent automatically to customer's email with quotation details.
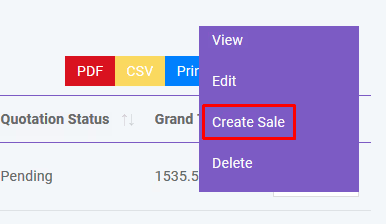
Create Sale
You can create sale from Quotation.
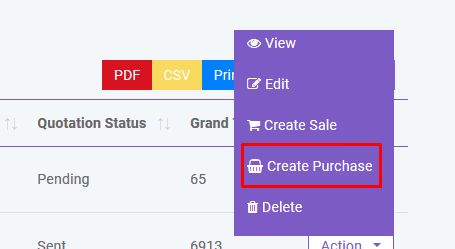
Create Purchase
You can create purchase from Quotation.
And you can search, export and print data from table.
Reward Point System
Introduction
The Reward Point System is a feature that allows customers to—
- ✔ Earn points based on their purchases
- ✔ Redeem points to pay bills
- ✔ Add/Manage points manually
This system gives complete control over earning and redeeming rules through the Reward Point Settings. From here, you can activate/inactivate the feature and set earning and redeem rules.
How the System Works
- – During each sale, the customer earns a specific number of points.
- – Earned points can be used to pay bills (Redeem Point).
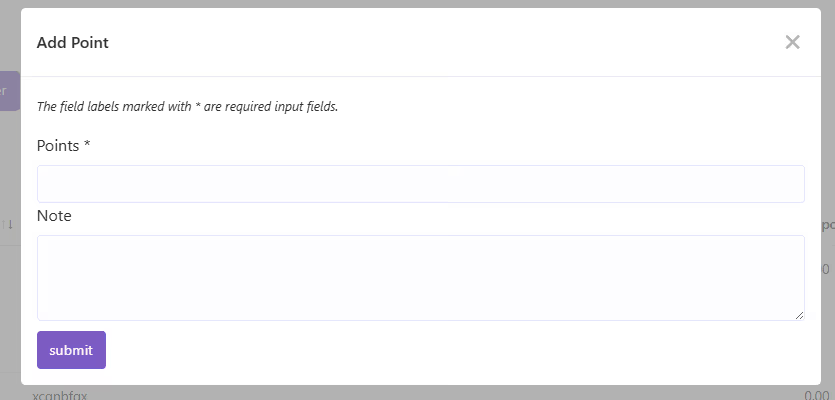
- – Admin can manually add points to any customer if needed.
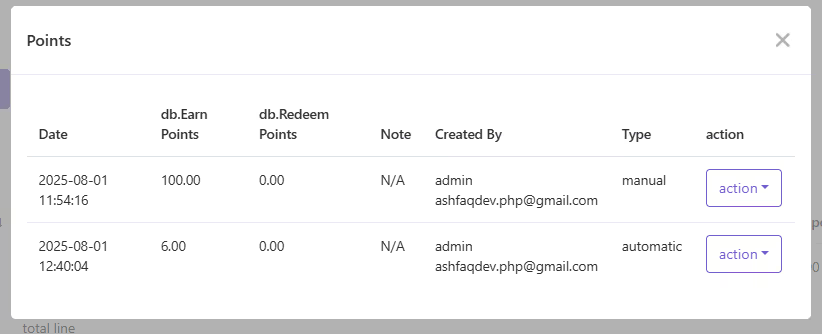
- – There are two types of points:
- * Automatic → Points earned from sales
- * Manual → Points added by admin
All reward-related transactions are stored in the reward_points table.
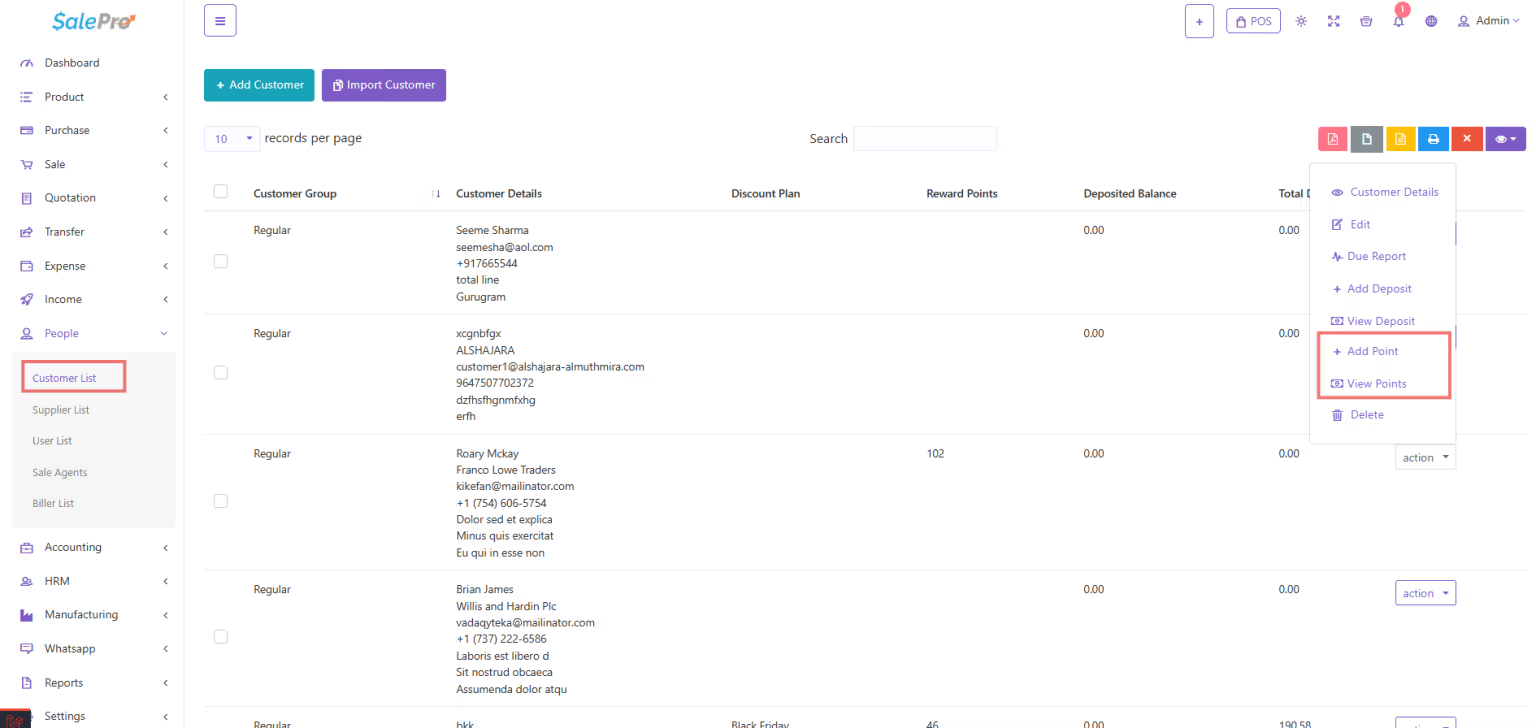
From the Customer List, clicking the "View Points" button shows the customer's—
- – Total Earned
- – Redeemed
- – Available Points
1. Reward Point Settings Details
1.1 Overview
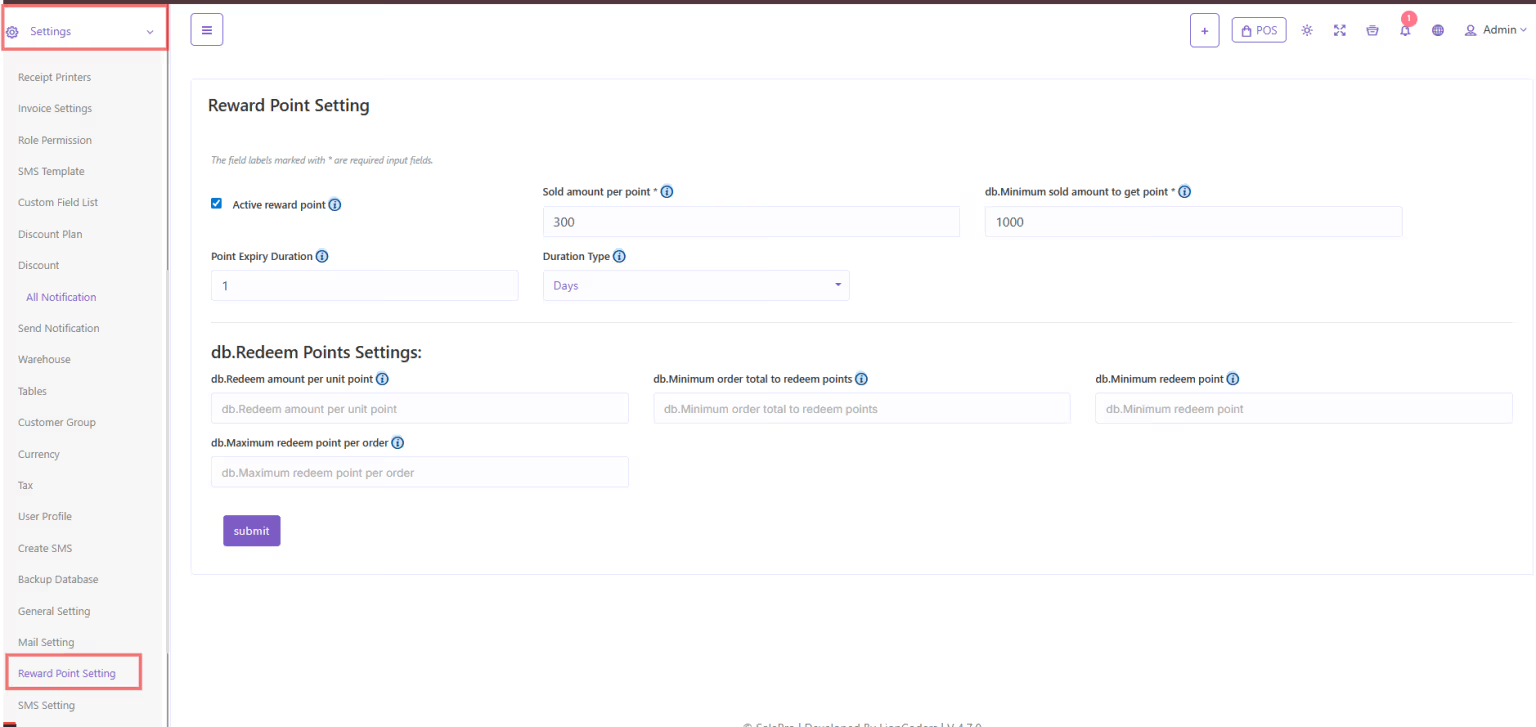
1.1.1 Where to Configure
All configurations are done from:
Settings → Reward Points Settings
1.1.2 Enable Reward Point
A checkbox is available to enable/disable the Reward Point feature:
Enable Reward Point (Active / Inactive)
1.2 Earning Points Settings
1.2.1 Sold Amount Per Point
Meaning: How much money a customer must spend to earn 1 point.
Example: If set to 100 → the customer earns 1 point for every 100 currency units spent.
1.2.2 Minimum Sold Amount to Get Point
Meaning: Minimum order amount required to earn points.
Example: If set to 100 → orders below 100 will not generate points.
1.2.3 Maximum Points Per Order (Optional)
Meaning: Maximum number of points that can be earned per order.
Leave empty or 0 → No limit.
1.2.4 Point Expiry Duration & Duration Type
Meaning: How long earned points will remain valid.
Duration Type → Day / Month / Year
1.3 Redeem Points Settings
1.3.1 Redeem Amount Per Unit Point
Meaning: Monetary value per 1 point.
Example:
1 = 1 currency unit
2 = 2 currency units
1.3.2 Minimum Order Total to Redeem Points
Meaning: Minimum order amount required to redeem points.
1.3.3 Minimum Redeem Point (Optional)
Meaning: Minimum number of points required to redeem in a single order.
1.3.4 Maximum Redeem Point Per Order (Special Rule)
⚠ Important Rule:
If the redeem request exceeds the Minimum Redeem Point limit → redeem payment is not allowed.
Example:
Minimum Redeem Point = 100
Customer Tries to Redeem = 120
Not Allowed — Redeem payment will fail.
1.3.5 Redeem Point Expiry Period
Meaning: Validity duration of the earned points.
After expiry → points automatically become invalid.
Reward Calculation Examples
Example A — Earn Calculation
Settings:
– Sold Amount Per Point = 100
– Minimum Sold Amount = 50
Order:
– Order Total = 550
✔ Earned Points = floor(550 / 100) = 5
If Max Per Order = 4 → Final Earned = 4
Example B — Redeem Calculation
Settings:
– Redeem Amount Per Unit Point = 2
– Minimum Order Total = 100
– Max Redeem = 50
Order:
– Order Total = 300
Required Points = ceil(300 / 2) = 150
Customer Points = 200 → Enough
Apply Max → Final Redeem = 50
Discount = 50 × 2 = 100 currency units
Reward Point Settings Page Screenshot
Customer Point View and add point button Screenshot
Customer Point View Modal Screenshot
Customer Add Point Modal Screenshot
Quantity Adjustment
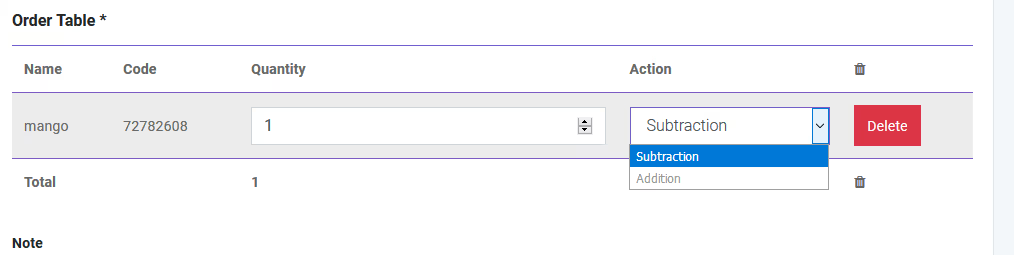
You can adjust product quantity in Quantity Adjustment module. There will be two operation: Subtraction and Addition
Stock Count
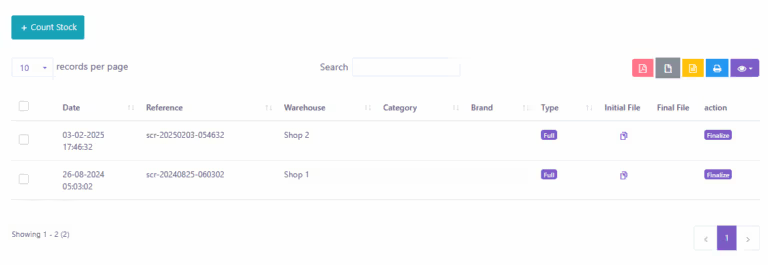
You can count your stock from this module. Two types are available: Full and Partial. In Partial type user have to specify brand and category and the software will automatically count the stock for that brand or category. Then this information will be written in CSV file which you have to download to finalize the stock count. Please follow the instruction properly. After finalizing the stock count you can automatically adjust the quantity of products if it is necessary.
Transfer
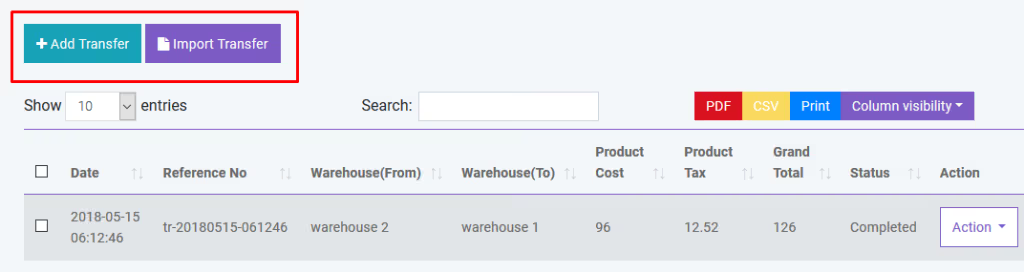
You can transfer your product from one warehouse to another in Transfer module. You can also transfer product with CSV file. You must follow the instruction to import data from CSV. To get better understanding you can download the sample file. You will get details of transfer by clicking in the table row.
Return
Sale Return
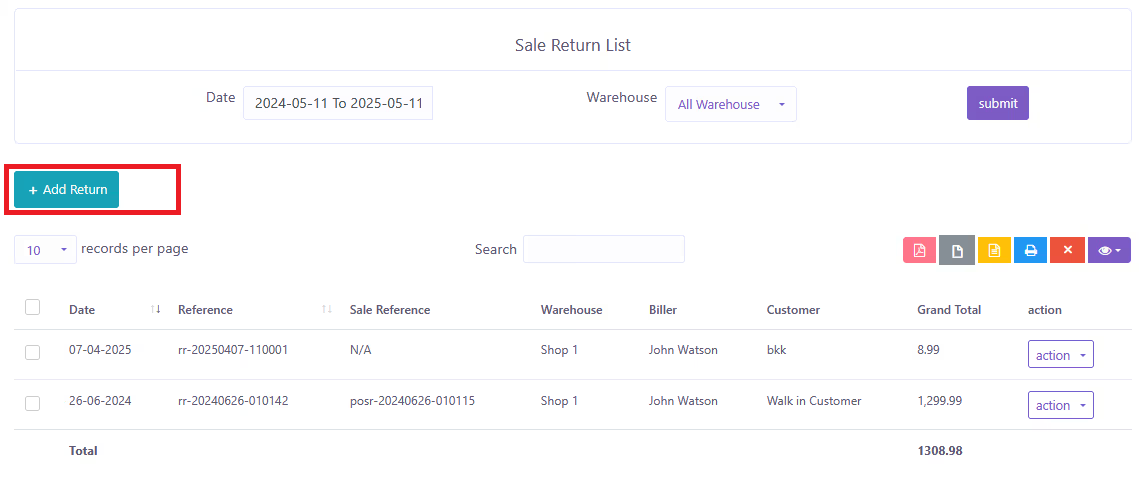
You can return your product with Return module. A confirmation mail will be sent automatically to customer's email with return details if customer refund products. Again if you return product to supplier a confirmation mail will be sent automatically to supplier's email with return details. You will get details of return by clicking in the table row.
Purchase Return
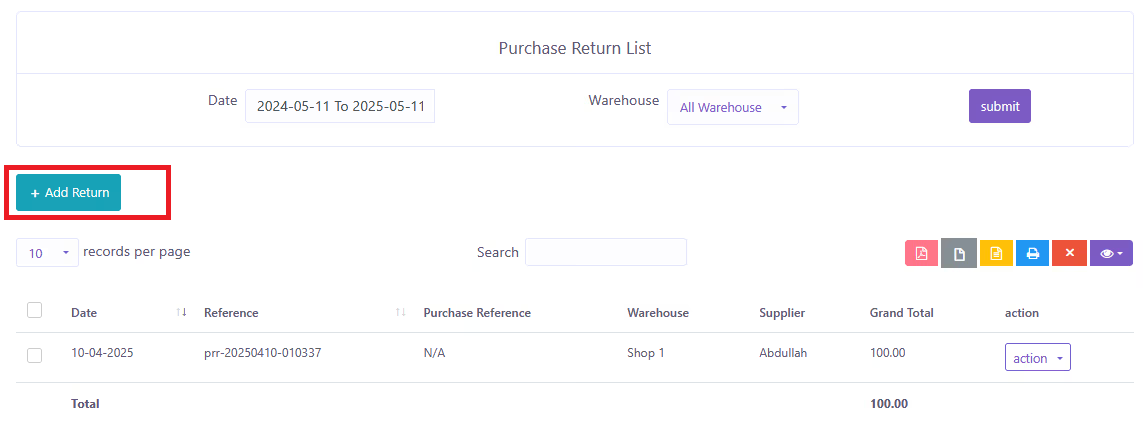
You can return your purchase with Return module. Here you will also have same functionality like Sale Return.
Accounting
You can create,edit and delete account to link all your transactions. You can also set default account for sale. All the payments must be done under an account.
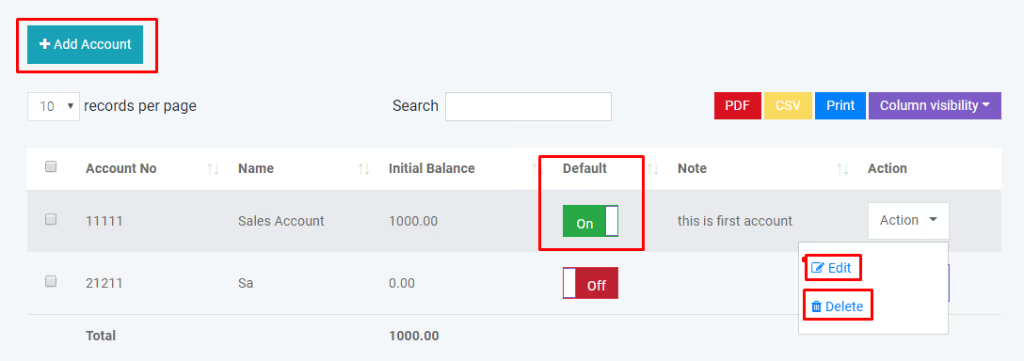
You can generate Balance Sheet of your accounts. You can also make Account Statement of an specific account to see all the transactions which has done with this account.Also, you can Transfer Money from one account to another.
HRM
Department
You can create,edit and delete department of your company.
Employee
You can create,edit and delete employee of your company. You can also give user access to employee.
Attendance
You can take employee attendance with this software. You can set CheckIn and CheckOut time in HRM Setting option under Setting Module.
Payroll
You can make payroll of your employee with this software. All payroll must be done from an specific account.
Holiday
You can create Holiday whichever days you want and also, you can Edit or Delete them.
People
Add User
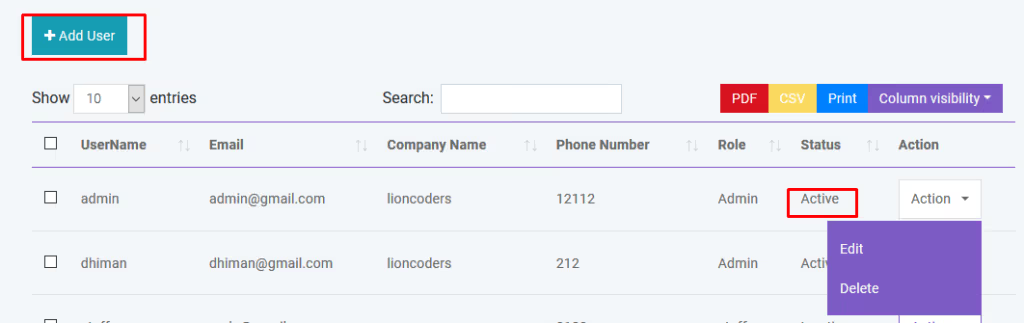
You can create, edit and delete user account. By creating user account password will be sent to the user's email that is given. Again you can active or inactive a user.
There is also be a register option to create user account. But his/her ID will not be activated until admin will approve it.
Add Customer
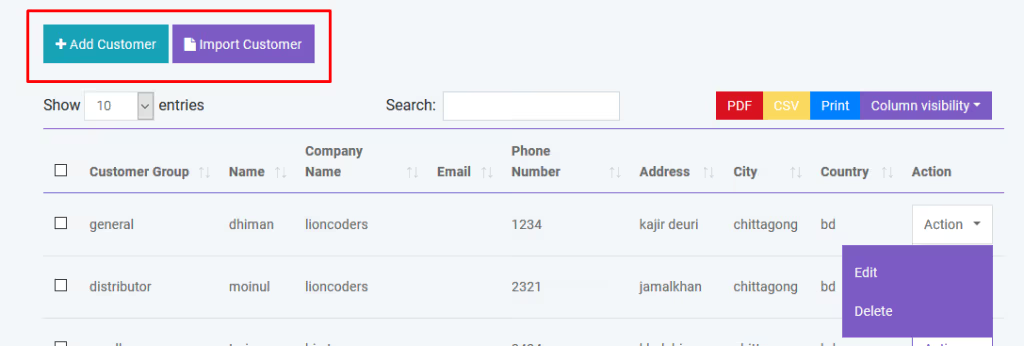
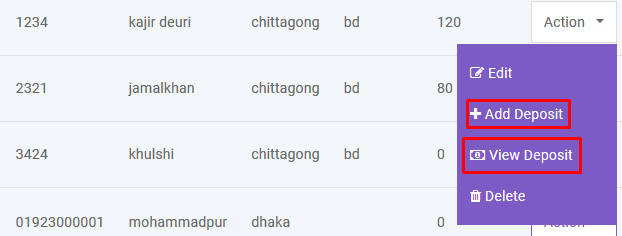
You can create, edit and delete customer. After creating customer a confirmation email will automatically send to customer. You can add money to customer's database just like a bank account. You can also import customer with CSV file. You must follow the instruction to import data from CSV.
Add Supplier
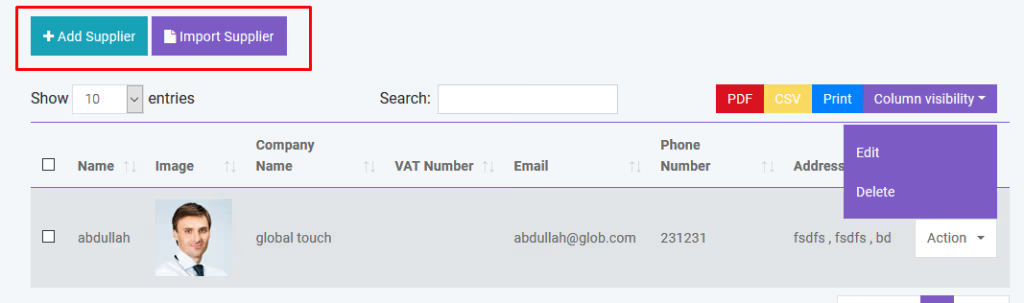
Supplier is the people from whom you purchase products. You can create, edit and delete supplier. After creating supplier a confirmation email will automatically send to supplier. You can also import supplier with CSV file. You must follow the instruction to import data from CSV.
Reports
You can create generate various reports automatically by using Hisab One.
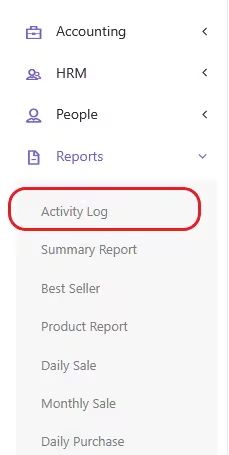
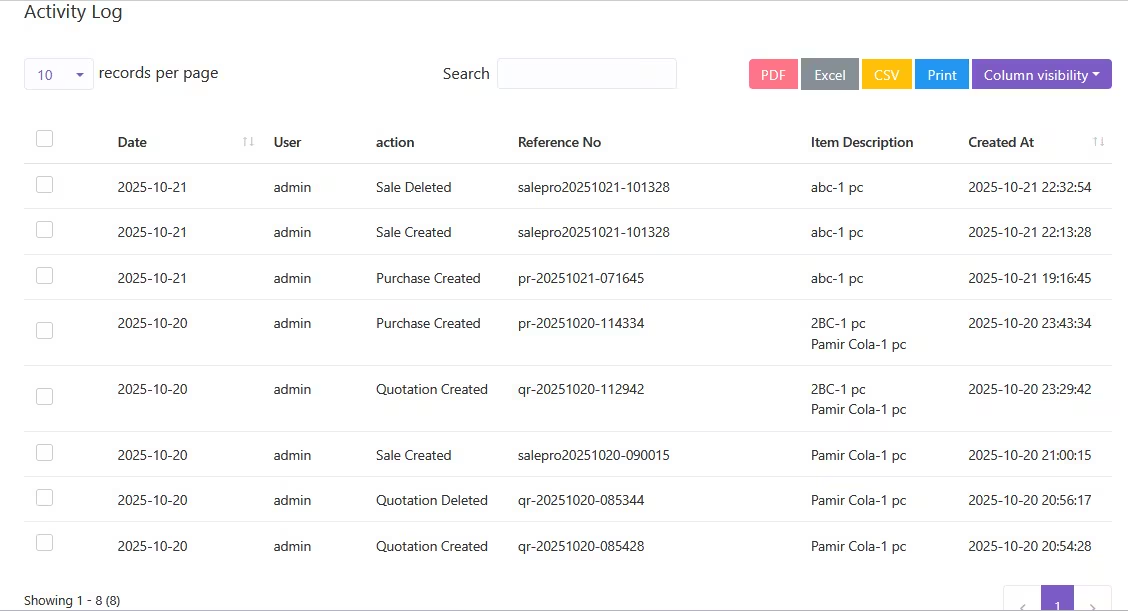
Activity Log
HisabOne now includes an Activity Log feature that allows users to track actions performed within the system. You can see who created, updated, or deleted sales, purchases, and quotations, providing full transparency and easy auditing of all key operations.
Daily Sale Objective Alert
You can set daily sale objective for specific products. Meaning the minumum sold quantity for a product in a day. If the product can not fulfill the objective user will be notified on the dashboard. To make this feature automated you have to set up the cron job correctly.
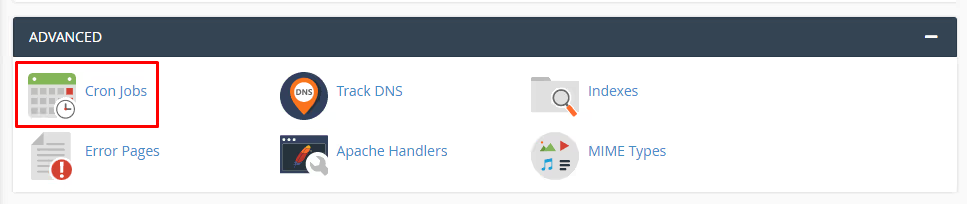
First go to the cpanel and go to the cron job settings
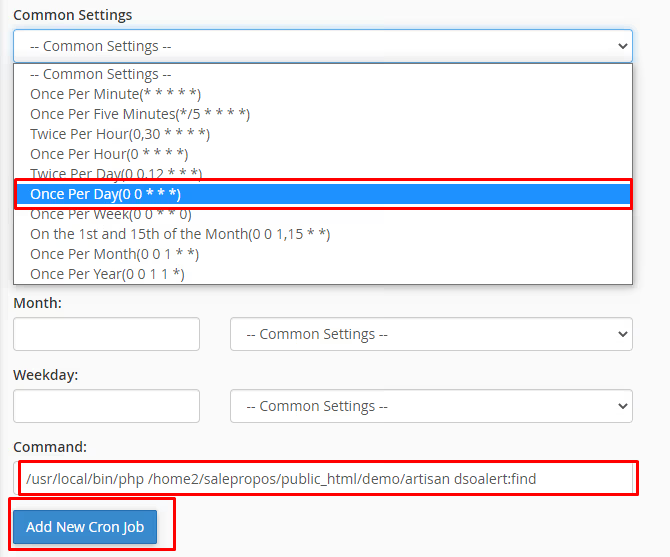
Then set up the cron job as described below. Here cron job is set up for once per day. So the system will check at 12:00 am if any product can not fulfill the daily sale objective for previous day. Products those can not fulfill the daily sale objective will be listed to the daily sale objective report.
Manufacturing
Production List
You can create, view and delete production in Manufacturing module.
And you can search, export and print data from table.
Whatsapp Settings
Creating a New Meta App
- 1. First, the user navigates to "developers.facebook.com/apps".
- 2. The "Create App" button is clicked.
- 3. On the "Create an app" page, the "Other" option is selected, and the user clicks "Next".
- 4. From the "Select an app type" page, "Business" is chosen, and the user clicks "Next".
- 5. The app name is typed".
- 6. From the "Business portfolio" dropdown, the Whatsapp Cloud Message account is selected.
- 7. The "Create" button is clicked.
Adding the WhatsApp Product to the App
- 1. After the app dashboard loads, the user scrolls to the "Add products to your app" section.
- 2. The "WhatsApp" product is located, and the "Set up" button is clicked.
WhatsApp API Setup and Adding a Phone Number
- 1. On the "API Setup" page, the user goes to "Select phone numbers" under the "Send and receive messages" section.
- 2. The "From" dropdown is clicked, and the "+ Add phone number" option is selected.
- 3. In the pop-up, type the "Business name".
- 4. select your country
- 5. type your Business website name
- 6. The "Next" button is clicked.
Navigating to Meta Business Manager
- 1. Switches to the "business.facebook.com", which is the Meta Business Manager.
- 2. The "Settings" gear icon at the bottom of the left-hand navigation menu is clicked.
Assigning Assets to the System User
- 1. Once the "Business settings" page loads, "System users" (under "Users") is clicked in the left menu.
- 2. The system user named is selected.
- 3. The three-dot menu (…) next to the user's name is clicked, and "Edit" is selected.
- 4. In the "Edit assets" pop-up, "Apps" is selected first.
- 5. The app is selected, and the "Full control" option on the right is enabled.
- 6. Next, "WhatsApp accounts" is selected.
- 7. The WhatsApp Business Account is selected, and its "Full control" is also enabled.
- 8. Finally, the "Assign assets" button is clicked.
Generating a Permanent Access Token
- 1. With the system user still selected, the "Generate token" button is clicked.
- 2. In the pop-up, the app is selected from the "Select app" dropdown.
- 3. For "Token expiration," the "Never" option is selected.
- 4. In the "Assign permissions" section, the `whatsapp_business_messaging` and `whatsapp_business_management` permissions are selected.
- 5. The "Generate token" button is clicked.
- 6. The newly created permanent token is copied by clicking the "Copy" button.
Inputting Credentials into HisabOne
- 1. Go to the "HisabOne" application dashboard.
- 2. Navigates to the "WhatsApp Settings" page from the left-hand menu.
- 3. This page shows fields for "Permanent Access Token," "Phone Number ID," and "Business Account ID".
- 4. Set all information here.
Settings
Invoice Settings
We have fully customizable Invoice Settings. Please go to Settings -> Invoice Settings.


Role Permissions
You can create, edit and delete user roles. You can controll user access by changing the role permission. So, under a certain role users have specific access over this software

SMS Template
You can create SMS Templates for sent SMS easily and obviously this can save your time. You can also Edit and Delete them from action button.

Custom Field List
Here is a great thing you can do. You can add custom field list for Product, Sale, Purchase, and Customer. You can also Edit and Delete them.

Discount Plan
Discount Plan for a specific customer or more then one customers. You can Create, and Edit Discount Plan.

You can Inactive a Discount Plan any time from Edit. You can do this also while creating one.

Discount
You can Create and Edit Discount. See the picture below.

For Creating a Discount you must have at least a Discount Plan. You can choose this Discount for all Products or a specific one. Also, you can choose days for Discount like, if you choose Friday then it will only available for Friday.

All Notification
Here, you can see list of all notifications you've sent to your customers.

Send Notification
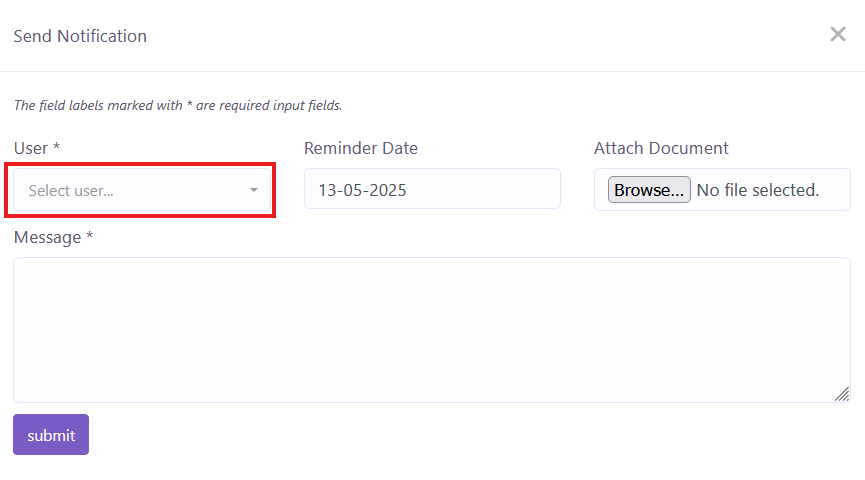
Notify your customers and staffs about something special or to do. Here, in the User field you can select your customer to send notification.
Add Warehouse
You can create, edit and delete warehouse. You can also import warehouse with CSV file. You must follow the instruction to import data from CSV.

Add Customer Group
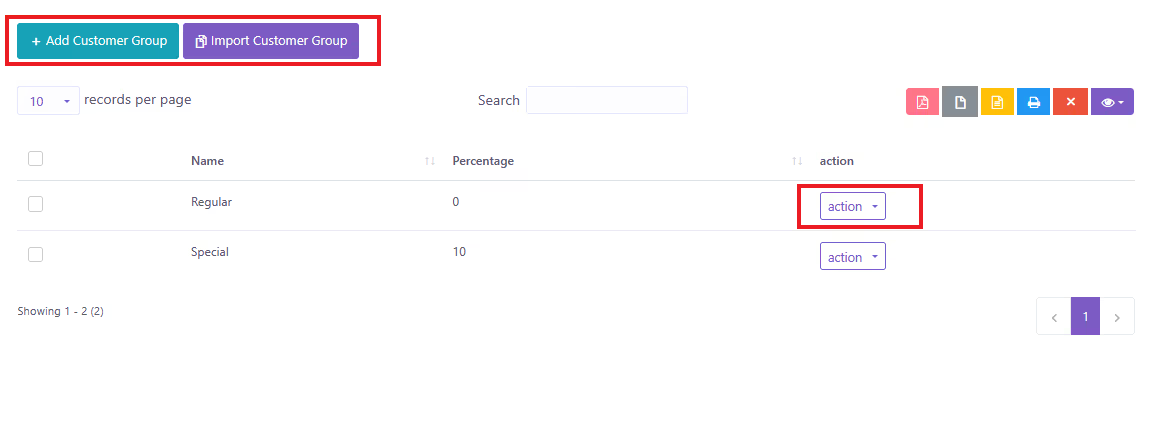
You can create, edit and delete customer group. Different customer group has different price over the product. You can modify this by changing price percentage in Customer Group module.
You can also import customer group with CSV file. You must follow the instruction to import data from CSV.
Add Brand
You can create, edit and delete product brand. You can also import brand with CSV file. You must follow the instruction to import data from CSV.

Add Unit
You can create, edit and delete product unit. You can also import brand with CSV file. You must follow the instruction to import data from CSV.

Currency
You can add Currencies from here. Also, you can Edit them. So, how it works? We consider Base is US Dollar so, if you see the Currency Taka which has exchange rate 121. Now, if you set a price 2 US Dollar for your product then price in BDT will be 242 Taka. Be careful here cause, if you don't set exchange rate properly then your product price will become weird.

Add Tax
You can create, edit and delete different product tax. You can also import tax with CSV file. You must follow the instruction to import data from CSV.

User Profile
You can Edit your profile and also, you can change your password too.

Create SMS
You can sent SMS to one or many customers from here. You don't need to provide phone number just search and select customer and our system will automatically select number of that customer's.

Backup Database
To prevent any uncertain situations you can always keep you data backup. Just click and it will download to your Computer.
General Settings
You can change Site Title, Site Logo, Currency, Time Zone, Staff Access, Date Format and Theme Color from general settings
Reward Point Setting
You can set Sold amount per point and Minimum amount to get points and you can set duration for these points. Also, you can Active or Inactive points.

Payment Gateways
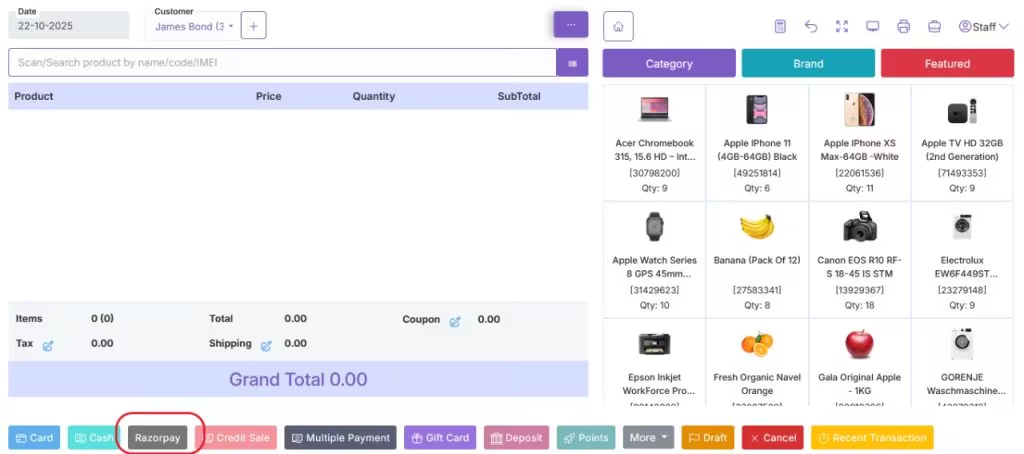
Currently, we have these payment gateways, PayPal, Stripe, RazorPay, PayStack, Mollie, Xendit, Bkash, SSLCommerz, Mpesa, Pesapal, and Moneipoint. You can use any of them or multiple by provide your credentials for them.

Razorpay is now integrated into the POS, allowing users to accept secure and seamless online payments directly from the system.
Barcode Settings
You customize your Product's Barcode from Barcode Settings.
POS Settings
You can set your own POS settings from this module. You can set default customer, biller, warehouse and how many Featured products will be displayed in the POS module. You have to set your Stripe public and private key for Credit Card Payment. To implement payment with Paypal you have to buy live api from Paypal. You will also need to fillup the following information.

HRM Setting
You can set default CheckIn and CheckOut time in HRM Setting.
SMS Setting
You can use Bulk SMS service via Twilio and Clickatell. You just have to fill the information correctly to activate this service. Please provide country code to send sms.
Translations
Change Language
You can change your desired language from here.
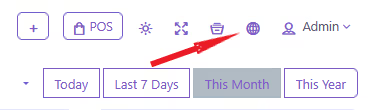
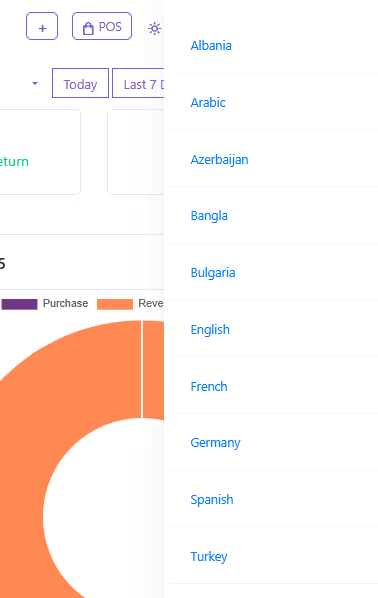
After clicking, a window will appear like this and you can change default language from here.
Manage Languages
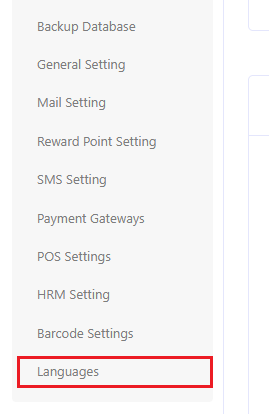
To manage language please go to Settings -> Languages
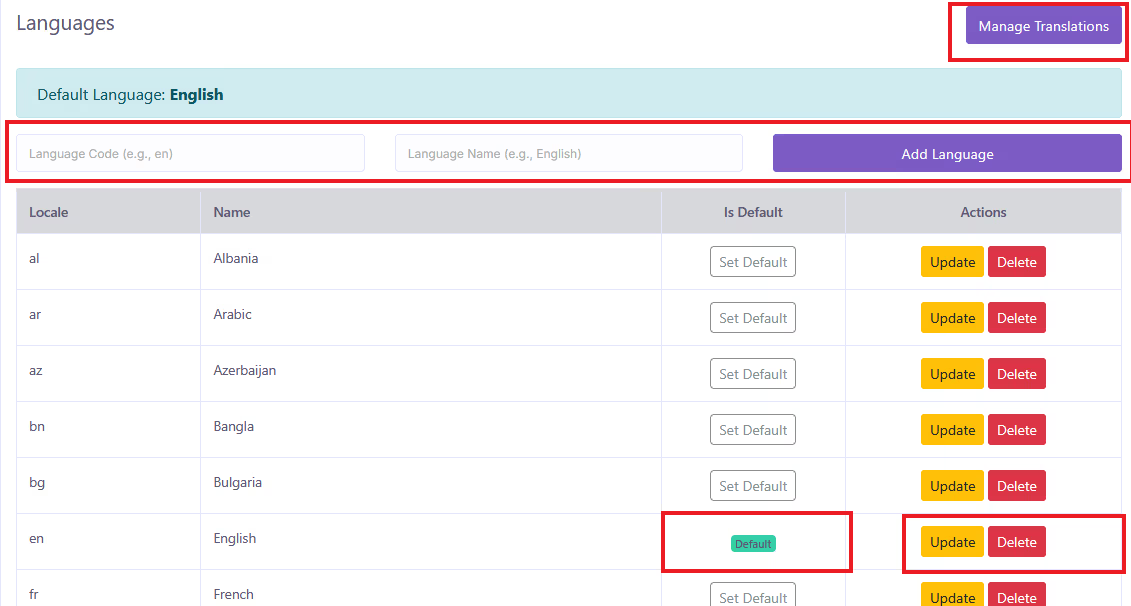
In Languages page,
- * You can Add new Language by providing it's locale code and name. It is highly preferable to give locale code and name properly.
- * You can change default language by clicking Set Default.
- * You can also Update or Delete a Language But you can not Delete a Default language. Here, you can not Delete English language and if you want to delete it then you have to select another Language as Default first.
If you want to Manage Translations then please click to Manage Translations on top right corner. Or, top left corner if your layout is Right to Left(RTL).
Manage Translations
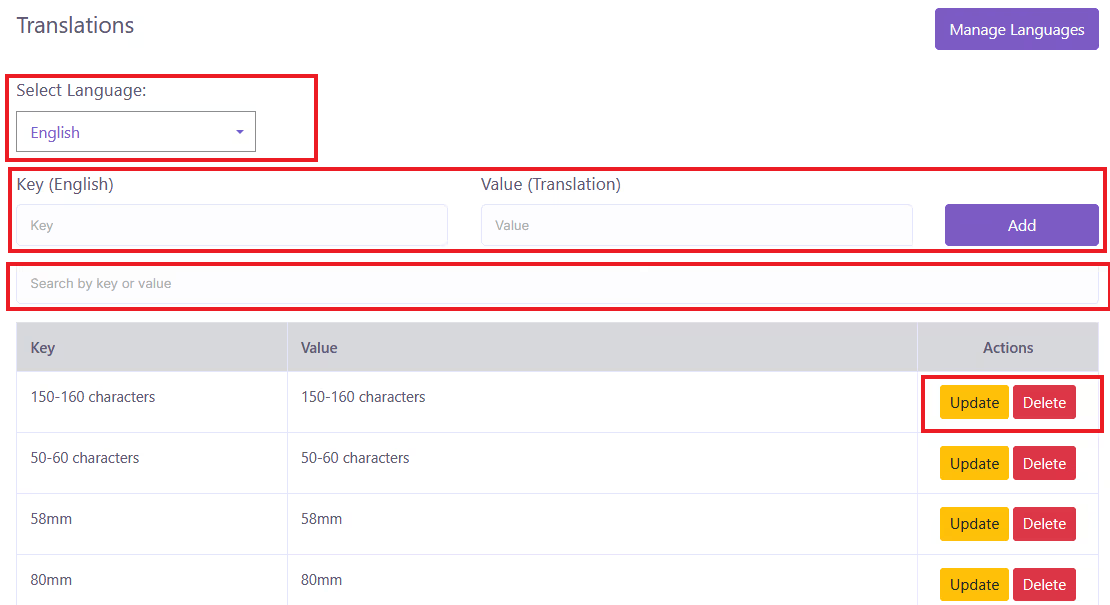
In Translations page,
- * You can select any Language to see it's list of translations and Edit/Delete. Note: Selecting Language will not change Default Language.
- * You can Add translation by providing Key and Value. Key must be in English.
- * You can search any Translation by typing Key or Value.
- * You can Update or Delete translations by using Actions button.
Note: Before Add or Edit translations make sure you select the right Language.